Tuesday, August 28, 2012

Vintage Look

Hello Readers!
Perfectly Pink and I are obsessed with a bold red lip, and I love how it just really pops. So I toned down the eye makeup, so that the red lips pop even more, and when I was done I realized it look vintage! Like in those old movies...

First, prep your eye lid with urban Decay's Primer Potion. I like to use this in all of my looks, because it keeps you eye makeup on forever, or until you take it off!


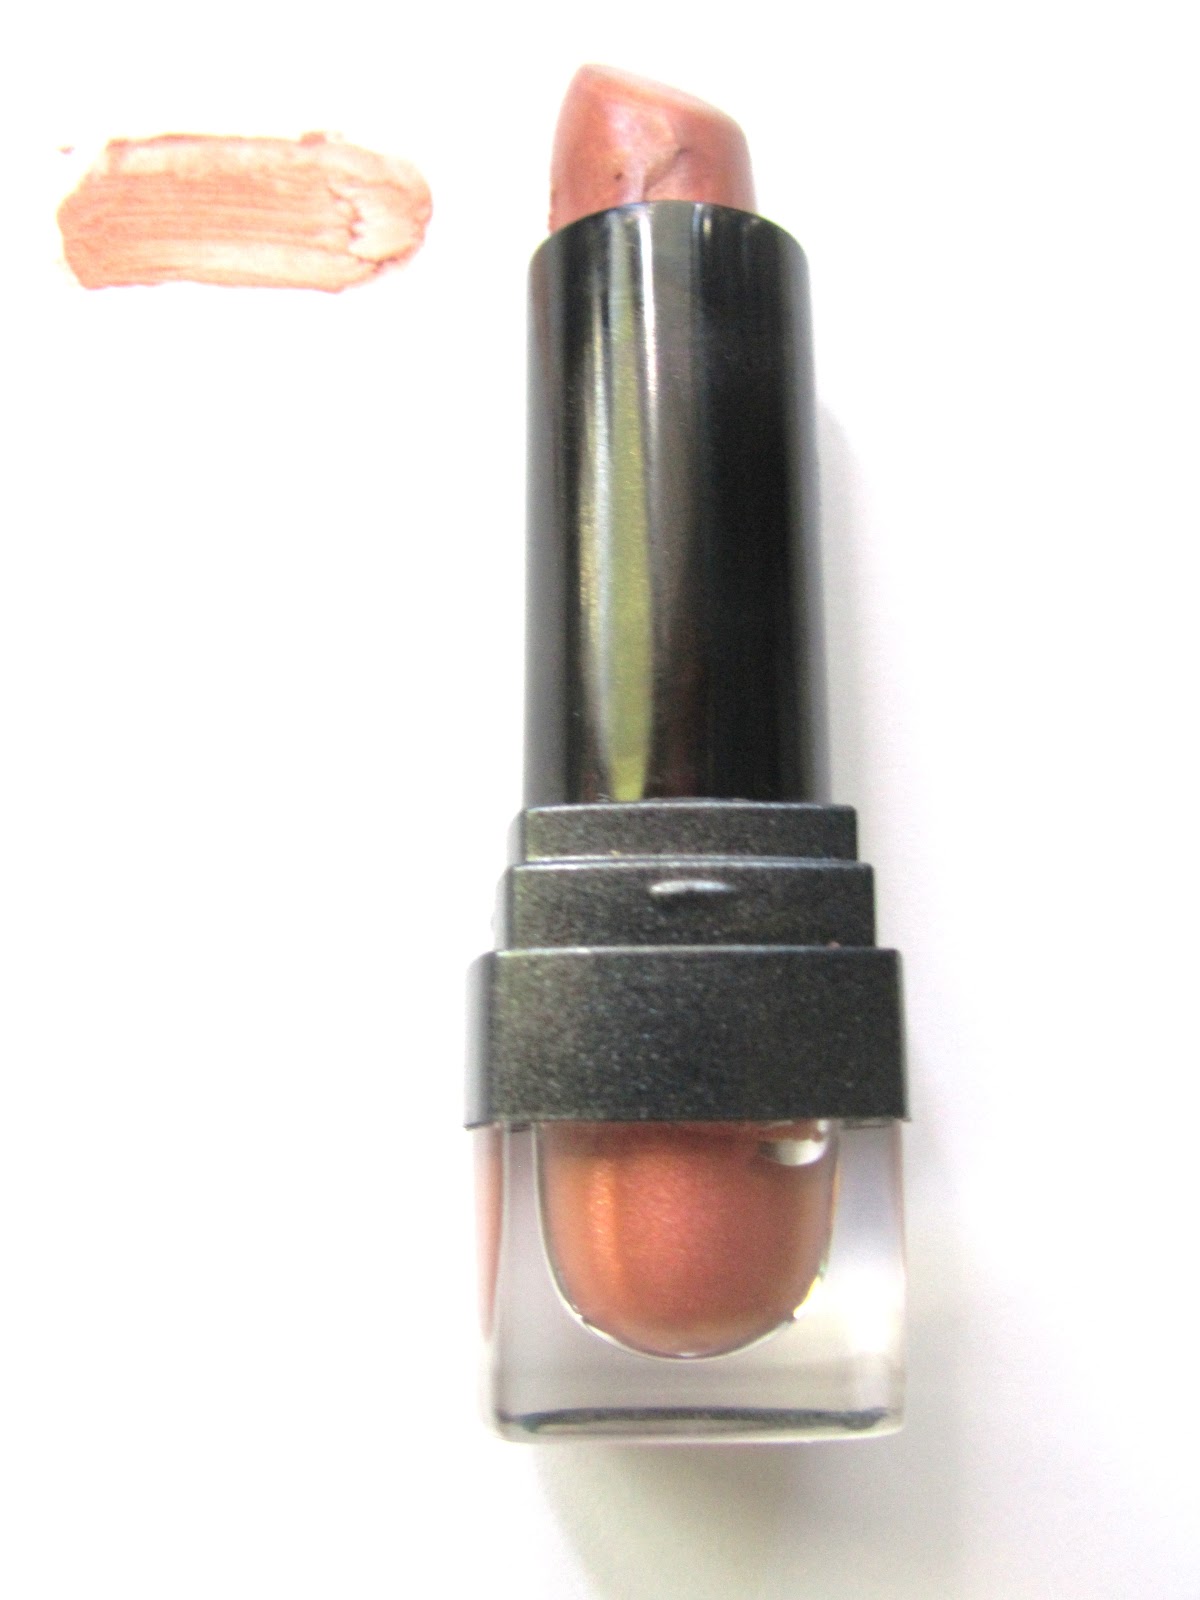
Next, take Orb from Mac Cosmetics and put it all over the lid. Its a really light tan color, its great for a simple base.It can also be put all over the lid with a swipe of mascara to create a cute look that's easy if your running late. It's a lighter color, which isthing that I love about this look is that it starts with a really light color, and we keep layering darker and darker colors.

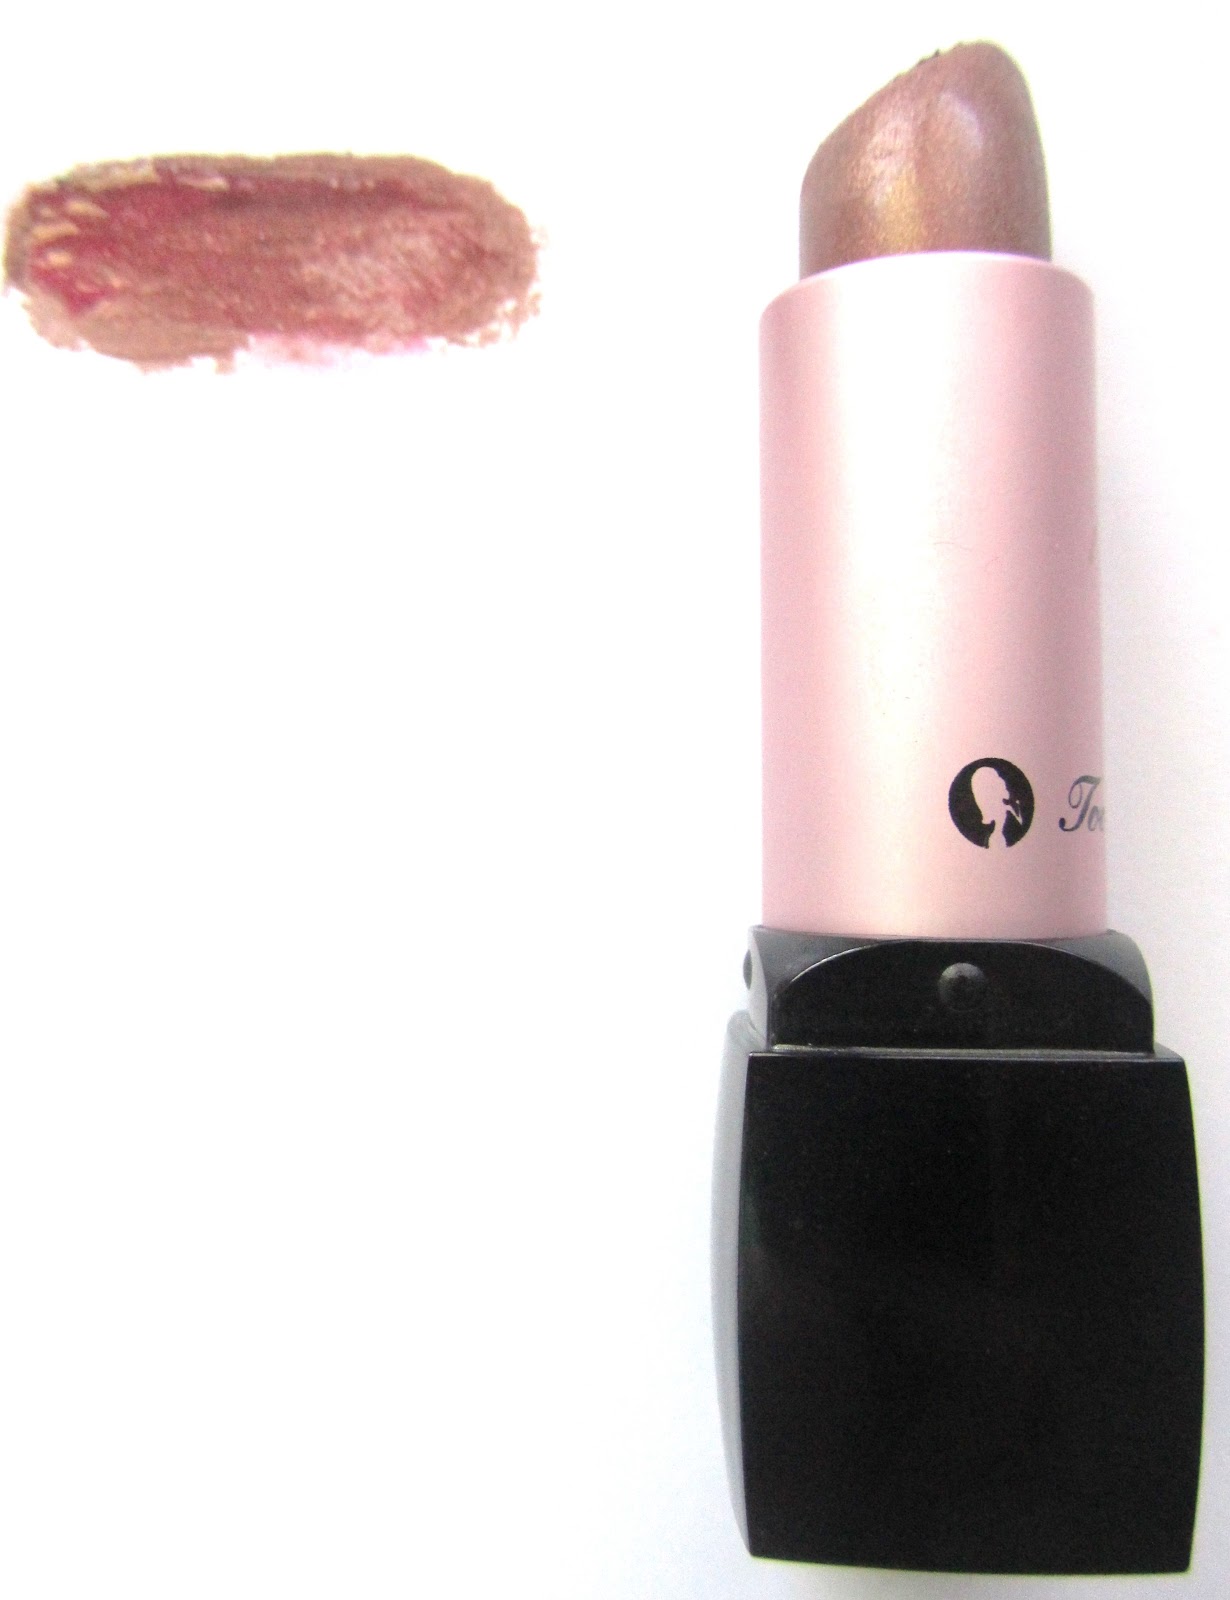
Then put modelette in the crease. Don't put a lot in, because there is much more layering to be done in the crease after this! This is one of my favorite Mac eyeshadows, it's a great brown because it's not too light that it doesn't really make a difference, but it's not overly dark either.


Now to the same thing with Naked Lunch, just keep layering it up towards the eyebrow. But there is no need to go all the way to the eyebrow! Unless you want to of course...


Next slightly out Patina on top of that, and by putting it on top I don't mean completely covering up Patina, just keeping bringing the look towards the eyebrows. (But you don't have to go nearly that high!)


And finally, take cork and put on the final layer, and put some in the inner corner if you want. That creates a darker look, but I preferred to keep it light so I didn't put it in the inner corner. Try to keep the eye look as light as possible, so the lips will really pop.


And to finish off the eyes, you need some long black lashes! The best mascara to do this with is Mac False Lashes. It is the best mascara to get the long black dramatic lashes!


Then, to top it off with a bold lip, use Tart Fiery Matte Lip Tint. This is amazing! It is a deep bright red, it works better than any other lipstick I have ever tried... I suggest that to get a really neat line, use a lip brush, because the tip of the lip tint is rather thick. If you want to make it glossy you can add some lip gloss on top, because this is really matte.

Try taking some pictures of yourself outside with this look, you will be amazed by the results! Perfectly Pink and I did this look for some pictures and it was amazing!


Comment and tell me what your favorite lip product is to create a bold red lip! And follow us already is you already haven't!


Saturday, August 25, 2012

Two Step Eyes + My Quick Tips

Hey Everyone!

     I have come across my new go-to color for a soft, natural eye, and it is Mac's Cork. This soft brown is amazing with any look, but I have been loving it on its own. Typically I am all for the looks that have fifty steps, but this is so pretty by itself, I don't want to mess it up!

Cork is a really soft camel brown, and it is so easy to apply. I just buff this in all over my lid with a 217 and then create a little more definition in the crease by applying this with a 219. By using only one color, it looks like I have spent hours creating the perfect look. The key to any makeup look is to add depth to the eyes, and this is the perfect color for that.


Finish this off with a little mascara and you are done! You can actually add two to three coats of this if you want to wear this out at night, but one works for me during the day. Make sure to use a thickening mascara, it will add the perfect touch.


For the face, the 182 buffer brush is a life saver. You can apply any powder foundation within seconds and have it blended in perfectly. Make sure to use this in small circular motions around your face for the most flawless coverage. I use this with my mineralized skin finish natural in light-medium.


The best way to easily finish off a neutral look is to add a pop of color in a gloss. This is Lychee Luxe from Mac, and it is the perfect coral-pink. This has these really tiny flecks of golden shimmer to it, which makes your lips look fuller.


That is my favorite way to create a fun look in minutes! Make sure to tell me in the comments what your effortless look is, and make sure to follow. Thanks for reading!


Thursday, August 23, 2012

How To Create A Fast, Flawless Face

Hey Everyone!

     I have been working on a quick routine for a fresh, flawless face, and I think I have finally found a solution! I have always used a quick spritz of water on my brush for any full coverage foundations, but I never knew it could be so easy to create a perfect canvas within seconds, just be using water. This is my favorite way to stay matte throughout the day without it looking too flat.

My first step is to prime your face using your favorite primer. Mine is Smashbox Photo Finish, it is a little more expensive but it will last forever. This is still in the old packaging, but it is the original formula. I apply this really quickly with a 189 brush, you only need a quick layer for this step.


Now that we have the perfect base down, we want to add a little more coverage. If you have seen some of my previous posts, you know I absolutely adore my Mac Mineralized Skin Finish Natural. This is my favorite setting powder, but by using a 187 brush and a little bit of water, you can easily turn this into a liquid foundation! You can use water on this because it is a mineralized product, but I would use a mixing medium if you are working with any of their "cooked" products that do not contain minerals.

Take your 187 brush, and spray it two or three times to get the tip of it damp. I love to use a duo-fiber brush for looks like this, it gives the lightest application and blends so easily. Now you can pick up a little of your powder and buff it in. This lets your skin shine through, but it will take care of any redness or discoloration. I would still use concealer under the eyes, but that should work for the perfect light to medium coverage.


My newest trick is to blend your blush up, not out. You want this to be very soft, the 80's look of having a harsh line is still out, unless I didn't get the memo. Start at the apple of your cheek and then blend up, this will distribute the product and tricks the eye, creating the look of higher cheekbones. If you want a quick face-lift, make this your secret weapon. This is Mac's cream blush in Poesy.


The quickest way to add a pop of color is to apply your favorite lip color, I chose my NYX Peekaboo Neutral lip pencil with a hint of Mac's C-thru gloss in the center. This created more fullness, and it will bring out any of the high points on your face. 


All you have to do is finish off with your favorite eye look and you are finished! One of my other favorite powders to use wet is the NYX black label powder, this is amazing for setting areas with fine lines, such as any undereye concealers. I like to use this with a smaller form of the 187, the 188, and apply it with a light hand to any areas that need some more coverage. The darker swatch is wet, and the lighter one is dry.

Those are my favorite ways to create a really quick foundation routine! If you used a cream blush like I did, make sure to apply it first before the powder. I love the whole concept of using different products in their "wet" form, it really brings out the richness of the color.

Tell me in the comments if you have tried this before, and make sure to follow! Thanks for reading!


Tuesday, August 21, 2012

How to do a French Manicure!

Hello Readers!

   I love doing french manicures..... They look amazing and super hard to do! But truly with a little practice it is easy! You will look like you went to a salon and spent lots of cash getting it done, but really you have done it for barely anything at home! If you do these French Manicures, you will be sure to get lots of compliments!

First, clean your nails even if you have no nail polish on them. This will just prep your nails, and make sure they are super clean. Because with these french manicures, even the slightest dot will show up.


Next, take a bright white nail polish and draw a thin white line across the top of your nail. Try to make the line very round, like a half circle almost. Also, try to do a thin line. If you do a thick line it looks gaudy and tacky.

Then take a very light pink. I used Prima Ballerina from Essie. After you do this, your nails will appear shinier, and more feminine. Some people use a top coat instead, but it doesn't really look like a real french manicure then. Trust me.

Finally, put some nail polish remouver on a Q-tip, and go around your nail. This will get rid of any white that isn't in the right spot! It also cleans up the look and makes it look neater.

Voila! I hope you enjoy your french manicure! Just keep practicing and you will get it! Comment and tell me what your secret is to making the white line perfect! And follow us if you haven't already!

Sunday, August 19, 2012

My Favorite Dark/Bold Lip Products

Hey Everyone!

     Glitter Girl and I have a new obsession: bold lip colors. Not only do they photograph beautifully, but you can apply these pretty quickly to pull your look together. I would wear any of these with my neutral eyes look, or any other natural makeup. I swatched the color to the left of the product, so check those out as well!

My first pick is more of a darker lip, it is Mac's Morning Coffee lip pencil. This is a deep reddish-brown, and it will work with any skin tone. You could top this off with a sheer neutral gloss, or you could make this even deeper with something more opaque. This is a pro long-wear lip pencil, this seriously stays on all day without budging. I like to apply my EOS lip balm to the middle of my lip so I can smudge the pencil around more. This will also lighten the color up in the middle, creating a highlight.


If you are looking for a brighter lip, I love the Basic Red Chromagraphic Pencil. This is so opaque and creamy, the texture of it is incredible. This is a limited edition product, but most CCO's have it. This is more of a orange based red, so it is a nice change from the basic blue based red. Chromagraphic Pencil's are typically a Pro product, but they came out in the Mac For Fall Color collection last fall, so check it out at your nearest outlet!


 My favorite opaque red gloss is Cherry Shine from Sephora. This is a really deep ruby red with a hint of sliver shimmer to it, and this works for layering or on its own. This has SPF 8 in it, so it does include some protection. I love wearing this with a softer shimmery color on my lid and black liner, it is so simple and easy to do if you are in a rush.


Bright pink's can be really flattering on cooler skin tones, but Blossom by BH cosmetics is universally flattering! I love layering a sheer pink over this, you can customize it by putting your favorite sheer lipstick/gloss over it. The BH cosmetics lip liners are waterproof, so they will last throughout the day.


If you want a really bold, opaque, matte red, my favorite is the Tarte fiery Lipsurgence natural matte lip color. This delivers an opaque layer of color in one swipe, it is the perfect blue based red. I actually got to try this in one of the Sephora Beauty Insider Sets, and it has been one of my favorites ever since. This does have a chunkier, round tip, so make sure to use a brush around the edges for the most precise application.


My next favorite is not really bold or a darker color, but it is definitely unique! It is the NYX Black Label Lipstick in 165 Pewter. This is the strangest coppery bronze, but it is actually a really pretty sheer copper. I do not understand why this is called Pewter, the color is the complete opposite. Anyways, this is my favorite color when I want to add a sheer, bronze sheen.


My final deeper lip color is Too Faced Cougar Lipstick. This is a really deep metallic coppery reddish-brown, and it is a lot prettier then the complicated description makes it sound! This is a darker color, so I like to wear it as more of a sheer wash. I love the packaging on this, it feels really secure. I love wearing Mac's Love Nectar over this, the combined shimmer makes your lips look so much fuller.


These are my favorite lip colors of the moment! I really love experimenting with different colors in Fall, you can get away with deeper lip colors and still look put together. Make sure to follow if you haven't, and tell me in the comments what your go-to lip color is for transitioning into fall. Thanks for reading!

Friday, August 17, 2012

Back To School Accessories


Hey Everyone!

      Today's post is on my favorite accessories to kick off the school year with. These are great to add on to your school wardrobe and your everyday one. I have been finding a lot of neutrals for fall that will work with any outfit, so I hope this will give you some inspiration in your back to school style!


Tote Bag: My first tip is to add some different textures to your outfits. I decided to use an ostrich print bag for an everyday tote. This is huge, so I can carry anything I need to with ease. This has braided handles and security clasps on the edges to lock into place when you are on the go, so it is the perfect option for the girl on the go.


The Basic Belt: My next must have is a preppy looking belt. These are the secret to adding the extra touch to your outfit, they define your waist and can spice up a basic tee. I usually get these in a smaller size so I can wear them around my waist, and this is one of my favorites. It is basic and simple, but it is an easy way to add a little color to an outfit as well if you want to go bold.

Classic Headbands: The easiest way to fix a bad hair day and add a touch of glitz to your outfit is to add an adorable headband! I can throw my hair back into a messy bun and save my horrid hair day with this. Make sure to tease your hair a little in the back before you add one of these to create a little more volume.


Fall Scarves: Because we are heading into fall, adding a silky scarf can really dress up any basic outfit. This is one of my favorite DKNY scarves, I wore it all the time. There are so many different styles that you can do with these, the possibilities are endless!


Neutral Flats: Flats are my go-to shoe in the fall because they are cute and comfortable. It is great to have a basic pair of neutral flats in your wardrobe because you can pair them with just about anything. These are my Coach flats, and they kind of blend in with the background! They are a really soft golden beige, which is a fun twist on the typical neutral.


That is my quick update on my favorite basics to wear everyday! I love adding in a couple of unique pieces every season, and these are some of my favorites. Tell me in the comments what your fall color palette is for accessories, and make sure to follow. Thanks for reading!


Thursday, August 16, 2012

Golden Glow Eyes


Hey everyone!


     This is my final back to school makeup tutorial, so I thought I would base this on more of a golden natural look. This would be great for an everyday neutral eye, and with a little more mascara, you can easily take this from day to night. This look also works really well with a lot of different lip colors, so let's get started!


Base Color: I first used Bare Study paint pot by Mac all over my lid to create a shimmery gold base. I applied this with a 217 brush and blended up to get a really soft wash of color. This can really brighten up your eyes, so if you want a basic look, you could just use this as your everyday primer.


Lid Color: I w
anted a gold color that was opaque and blendable, so I used Retrospeck by Mac all over my lid with a 239 brush. This has a really fine shimmer to it instead of that chunky glitter you often find in gold shadows, you do not have to put up with the fall out either. When you put this over Bare Study, it creates the prettiest golden glow that will work really well with plenty of crease colors. 


Outer Corner: I applied Cork to my crease using a 275 angled shader brush by Mac. Cork is a really soft and natural warm toned brown, but you can easily build it up depending on how opaque you want it. I also used the 275 to define my outer corner, this added a little shape and it merged really well with Retrospeck. Make sure to blend these well using a 224.


Highlight: I finished off the look with Blanc Type in my inner corners and as a brow highlight using the 219 and 227. I use this color everyday as a highlight, it is the perfect finishing touch to any look. This is also a matte squared finish, which is a really soft form of a matte shadow. This lasts forever because of its texture, and the application is so smooth. You can even add a little of this to the middle of your lid to create the effect of brighter and bigger eyes.


Eyeliner: I used my Tarte Emphaseyes HD liner on my upper lash line. This is really easy to throw in your bag to touch up with throughout the day because it is the travel sized edition, which is only a little smaller then the full sized. This has the perfect fine point to it, which is essential in creating those flawless lines.


Mascara: I decided to use my Sephora Full Effect Mascara for some extra length. The easiest way to take your look from day to night is to add a little mascara and eyeliner. This is the perfect size for carrying with you on the go, and it doesn't clump or smear for easy application. You can also use this on your lower lashes without it smudging down under your eyes. 


Finished Look: This is the final eye look! It is simple, natural, and it will work with plenty of lip and cheek combos. You could add a little of the eyeliner on your waterline if you want to make this more dramatic, or blend a little more or cork on to the outer corner. My main tip for this look is to use a light hand; you can always add more of the product, but it is harder to take it away from a finished look.


That is one of my more natural looks that can be completed in less than five minutes! Tell me in the comments what you do for an everyday natural look, and make sure to follow! Feel free to leave a request for a post, and keep an eye out for my upcoming fall makeup looks. Thanks for reading!


The Secret To Silky Smooth Hair

Hello Readers!
     I am always looking for a way to get my hair super soft and silky. One of my favorite ways was to straighten my hair at night, and then go to sleep and when I would wake up the next morning the natural oils would have gotten in my hair so it was silky and straight. I still love to do it that way, because it does work the best so far, but I have also found an amazing shampoo!
     Finesse makes amazing shampoo's that make your extremely smooth and soft! It also adds alot of volume to my hair. My hair tends to get very dry... So I use Finesse's moisturizing shampoo. It is hydrating, and I could not be happier with it! I don't even use a conditioner with this, because it is kind of like a conditioner and shampoo in one! But there is also a moisturizing shampoo that you can get.  If you try this out you will instantly see a difference, just run your hands through your hair after you put this on in the shower.  If you want to check out their website, click on this link.  http://www.finessehaircare.com/?page_id=8
     But remember, if you want silky smooth hair, don't shower every night, try to do it every other day,  because this allows all of the natural oils to get in your hair! Also, don't overuse heating tools, these really dry out your hair, you can use a heat protectant, but it's always still good to let them have a rest for a little bit. Finally,  when you are using heating tools, put it on a very high setting. I know this sounds like it will dry out your hair more, but actually, when you put it on the high setting you only have to straighten/curl your hair once. If you use a lower setting, then you have to keep repeating it on your hair, which is really bad for it.

I hope this helps you get silky smooth hair! If your have any comments/questions feel free to tell me in the contacts or request a post! Also comment and tell me what your favorite shampoo is!


Twitter Delicious Facebook Digg Stumbleupon Favorites More

 
Design by Free WordPress Themes | Bloggerized by Lasantha - Premium Blogger Themes | Premium Wordpress Themes