Monday, December 31, 2012

Pop of Emerald

Hey Everyone!


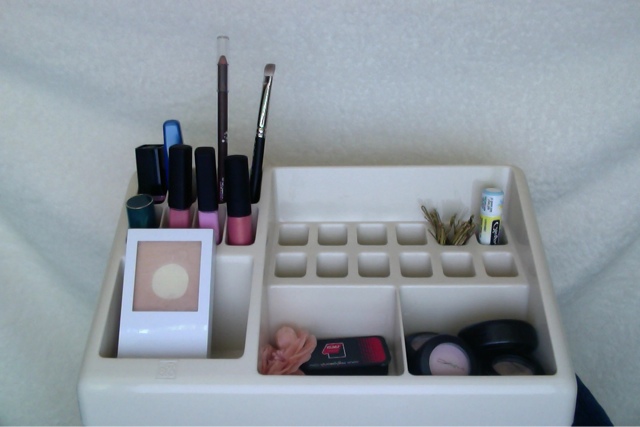
I was messing around with some blues and greens and I wanted to attempt to wear them in an everyday look. I love how it turned out; it is so much fun! Keep reading to see how I created it!


Start by priming the lids with a neutral primer.


I wanted to use a soft pink base to add a hint of shimmer, so I used the NYX jumbo shadow pencil in Yogurt.


I used an ELF 32 color palette for the green. The color I used in the third one in on the second row.


I applied Steamy by MAC to the outer corner with a 239 brush. After blending Steamy out, I lined my upper lash line with Plumage and applied it to my crease as well.


Apply mascara and that's it! Tell me in the comments if you have been wearing bright colors this winter. At first I thought I was crazy for trying to pull off brights, but I love it! Feel free to request a post in the comments and thanks for reading!


Saturday, December 29, 2012

New Years Eve Nails

Hey everyone!
I wanted to quickly update you all on my New Years Eve outfit/hair/makeup by posting on my nails! I have to admit, these are not super crazy, but they are a nice accent to the rest of my look. Keep reading to see what combination I used!


I started by applying two coats of a fuchsia polish to my nails. This one was in a set of mini OPI bottles; I have recently been going through my "use up every single bottle of polish" faze. I want a clean start to my nail polish collection, but it seems like it is impossible to finish an entire bottle! Sigh. You have to love the problems of a beauty blogger.


Seal in the fuchsia polish with your favorite glittery top coat. You can add a clear coat of polish and add glitter on top; I just like to add a little extra sparkle. This is Essie's Luxe Effects multi-dimensional top coat in Set in Stones.


That is it! Even though this is super simple, I love the look of a clean, well done manicure. I did this myself, but I still take precautions in attempting to have even brush strokes and not glob the polish everywhere...
Tell me in the comments if you have any crazy nail plans for New Years Eve and make sure to follow. Feel free to request a post and follow us on twitter under the username @foreverfuchsia. Thanks for reading!


Neutral With A Twist

Hello again!

I am so happy I finally have a routine put together for posts; do you like the tutorial/review plan? I have been recording my eye makeup every day since Christmas, so I have plenty of tutorials to do! Anyways, I was working with some new products and I wanted to create a fun version of a neutral eye. Keep reading to see the simple steps to achieve this look!


Start by priming the eyes with a neutral base.


Apply a creamy white highlighter to the brow bone and center of the lid.


Line the eyes with a shimmery gold eyeliner. I used Urban Decay's Eldorado.


I applied Club to my crease with a fluffy brush. I also used a card when blending to create a sharp angle.


The gold eyeliner is a statement product, but it can look over the top. I blended out the gold with Samoa Silk.


I wanted to bring out the golden shimmer in the liner, so I applied Trax with a fluffy dome brush to blend out the crease.


I applied Shroom to the brow bone to lighten up the look.


This is the finished eye! I love this unique twist on the typical neutral eye; it is so much fun.

Tell me in the comments if you have been using any pops of color/shimmer in your eye makeup and make sure to follow! Check us out on twitter under the username @foreverfuchsia and tweet us! Thanks for reading!


Friday, December 28, 2012

The Power of Pigments

Happy Almost New Year!


     I can't wait for 2013, but this year has gone by so fast! I was playing around with some colors for a New Year's Eve look and I came across my NYX pigments. I love my MAC pigments, but I almost forgot about these!

      I was looking for a new way to wear them; I wanted to really show the opaque colors. Keep reading to see my favorite way to wear them!


For a base, I used a two cream shadows in black and white.


The bottom row is that cream shadows swatched without anything layered on it. The top row is the same cream shadows with the NYX pigment on top. The white had a greater sheen to it, but the black turned into the prettiest steel grey! It shows how many different looks you can achieve with just three products.

 
      I have tried this technique over and over again with different colors and I am shocked at the different results every time. There are so many options with this! Tell me in the comments what pigment/shadow combos you have tried out and make sure to follow. Check us out on twitter under the username @foreverfuchsia and follow! Thanks for reading!

Thursday, December 27, 2012

Blue and Purple Ice Eyes


I am really excited. More like extremely happy. Your question of the moment might be, why? My reason is simple: I finally paired blue and purple eyeshadow together. And it worked. Yes, I understand that this is not major news, but it is amazing for me! I have always added either blue or purple to a look. I have finally conquered my form of impossible and put them together. I need to get some new hobbies.

Anyways, let's go ahead and get started!


Start by priming the eyes. I decided on MAC's Nubile paint pot to give me a neutral base.


                                                                        Next, apply a shimmery lavender shade all over the lid. I used to have issues with lavenders; I felt as though they were too youthful. This isn't necessarily a bad thing, but I did not want to get stuck in that Libby Lu makeup rut. By pairing this soft purple with bold blues, it makes it more of an elegant accessory.


I wanted to incorporate a brighter pop of color, so I used MAC's Freshwater. This look can be worn any time of the year, but you all know how I love my seasonal makeup! I used a small strip of tape to ensure that I would get a clean line of shadow. Make sure to stick the tape on the back of your hand a few times to make it easier on the skin. This removes any added tackiness to the tape which can pull at the skin causing premature wrinkles. I applied this with an angled shadow brush to my crease in a cat eye motion as well as the outer half of my waterline.


To finish off the cat eye wing, apply a thin line of a bright blue liquid liner to the upper lash line.


I combined MAC's Deep Truth and Satellite Dreams to set the eyeliner. This was easily applied with an angle brush to get the winged curve.


Blend out Freshwater with a blending brush, or use another color to fade it out. I used Stars n' Rockets with a fluffy crease brush to blend the colors out. This shade has a beautiful blue duo-chrome to it, making it more blendable.


I wanted to save the highlighting for last to get that fresh glow to the eyes. I first applied an white, opaque cream shadow to my brow bone and inner corner and then set it with a soft pink pigment. The iridescent shimmer in the pigment will catch the light, making you look wide awake.


Add mascara and the look is complete! Tell me in the comments what your look has been this winter, and make sure to follow. I am also excited about the forever fuchsia twitter account; it is a great way to interact with you all! Leave your twitter username in the comments if you have one so we can follow you!

 I have been using a different software to upload my pitures and post them. I also recieved a camera that I have been using for this post; is the quality better? I feel like you can really see the colors now, I love it! Feel free to request a post, and thanks for reading!


Wednesday, December 26, 2012

E.L.F. Beauty Eye Manual: Natural Eye Edition

Hey Everyone!

I am going crazy over the sales online. I have never gone out to shop the stores after a big holiday, but I do love online shopping! I am trying to be good and not get too much, but the BH cosmetics gel eyeliners are calling me... Anyways, I wanted to pot a quick review on my latest neutral eye staple. I was re-organizing my collection and came across this palette about a week ago. After testing out some color combinations, I decided to review it! Keep reading to see my thoughts on this affordable neutral palette.


This is set up to look like a beauty booklet; the cover consists of an example look and a glance at what is inside. There is also a small elastic band that goes around the palette to keep it secure.


The packaging feels sturdy; the cover has a slight cushion to it. This will prevent the shadows from cracking if you are traveling.


If you like step by step instructions, this palette is for you. They give you two looks that can be customized along with some extra space to write down your own creations.

This does not say anything about eyebrows; I can't find a color that works for me in the palette. I would recommend using your own pencil/powder to fill them in.


This palette consists of twelve shadows, one eyeliner, and a dual ended sponge tip applicator. I do not typically use the sponge tip applicator for anything more then swatches; I might replace this with a mini brush if I use it for traveling. The formula of these colors is pretty good overall; there were about three shades that fell short of the pigmentation that I was looking for. These colors can be worn as a sheer wash of color as well. The formula was a bit on the powdery side, but it made the colors more buildable. I would recommend to use patting motions instead of sweeping when applying to prevent fallout.


Here are a few swatches to show the pigmentation. I also switched the eyeliner in the shade Coffee that came with the palette on the far left. I like the eyeliner; it works for a natural look. I did have to go over it once or twice to get a bold, opaque line, but only one stroke is shown in the picture.


This is the simple neutral look that I am wearing today. All of the products that are in this look are from the palette except the urban decay primer potion that I applied under the shadows. This look took me about four minutes to do; it is great for the days where you are short on time. Overall, this is a great palette, and the quality is pretty good for the price. I found this for $5.00, but the prices may range depending on where you purchase it.

Tell me in the comments if you have tried out any of the ELF palettes, and make sure to follow! I hope you all had a lovely Christmas; thank you for reading!


Tuesday, December 25, 2012

Merry Christmas!

Merry Christmas!

I can't believe this year is coming to an end. Is it just me, or has it gone by extremely quickly? I am so thankful for my friends, family, and fellow bloggers! If you are a blogger or read this blog, thank you. We love you guys!


I didn't know what type of post I should do for Christmas, and I know that you enjoy makeup collection posts, so I decided to give you all a sneak peak! A detailed post will be up soon with my updates collection and storage. Feel free to leave other post requests in the comments!


I also wanted to show my go to winter wonderland makeup look, it has been pretty simple. I dressed it up a bit for Christmas, but this is what I usually had on this December. It mainly consists of duo-chromed and navy eyeliner... See why I adore it?


Anyways, I wanted to wish you all a Merry Christmas! Thank you so much for reading, and tell me in the comments what you are doing this Christmas.


Sunday, December 16, 2012

Review: Glo Minerals Shimmer Dust

Hey Everyone!

     I am back with a review from my latest favorite brand: Glo Minerals. Their line of products has recently been introduced to me, and I absolutely love them! The Holiday collection features some limited edition products that are perfect for creating a festive holiday look. Keep reading to see my favorite way to turn any beauty routine into a holiday routine!
Okay, could this be any prettier? The exclusive packaging is one of my favorites; it makes the product even more fun to use.

This is the Glo Minerals Shimmer Dust in Glisten Gold. This product comes in a silver as well, but I have been working with a warmer color palette for winter.


The pump works extremely well; it dispenses a light layer of shimmer. I have not had any problems with it clogging, and the packaging seems really well done.

You can unscrew the top if needed; I am sure I will find an use for the bottle once I have finished the product. The product itself reminds me of a very concentrated form of MAC's Pigments, but lighter. This does not feel heavy on the skin, and it is easily blendable.
As I was reading the back of the packaging, I saw the intended use. You can use this on your body and skin, so it is safe for your face! Apparently the beauty blogger in me jumped to the conclusion that it was for the face only...

Anyways, this can work as a highlighter, a light coat of shimmer, or pixie dust. Maybe all three.

I have not come across a product like this in my collection, it is new, creative, and fun to use. I applaud the company for not skimping on packaging, the bottle is absolutely irresistible!


This is one way that I have used it so far, and it looked amazing! I swatched the same black shadow on my arm twice, but I only sprayed Glisten Gold on the upper swatch. See the difference? Adding this anywhere into your look really brightens up your face.

You can layer this on top of any color, but I chose black to create the greatest contrast against my pale as Bella Cullen (yes, after the vampire transformation) skin. I know, I need my St. Tropez tanner, but for now I am going to just make it work.


Tell me in the comments if you have ever tried this on your face, body, or if you just fed it to your unicorn. Seriously, this stuff is so amazing, it is completely multi-purpose. Make sure to follow, and thanks for reading!

Saturday, December 8, 2012

Quick Update

Hey everyone!

I am so sorry we haven't been on lately, but I have been working on a ton of reviews! For a quick sneak peak, I have recently snatched the glo minerals holiday gloss set and I have been loving it! Lip swatches and close ups will be up soon, but for now, enjoy these!


I am also extremely proud of our new twitter account; we are already up to 98 followers! Tell me in the comments what posts you want, and thank you for reading!

Perfectly Pink

Twitter Delicious Facebook Digg Stumbleupon Favorites More

 
Design by Free WordPress Themes | Bloggerized by Lasantha - Premium Blogger Themes | Premium Wordpress Themes