Showing posts with label products. Show all posts

Friday, October 26, 2012

MAC Starter Kit: Eyeshadows

Hey Everyone!

    In my last post, I showed you how I organize my eyeshadows. I have some crazy colors in my collection, but I have my everyday neutrals that I always come back to. If I had to pick my top MAC eyeshadows, these would be my top choices to start your collection off with!

My First favorite is Shroom. This can be used to highlight your brow bone/cheekbone, and it is a beautiful lid color. Everyone needs to have a base color in their "eyeshadow wardrobe" and Shroom has to be my favorite.

How I wear it: I typically use this as a wash of color or a brow bone highlight.


 If you favor matte colors over shimmers, you will love Blanc Type. The matte squared texture is extremely soft; it lasts forever. This is one of the most frequently used colors in my collection, I just hit pan the
other day!

How I wear it: This must be my go to highlight, it is so natural and applies smoothly. Did I mention that I adore this at all?


Naked pigment is one of my must haves. The neutral base is full of shimmer, making it perfect for an all over wash of color. If you like
your lid color to be extremely opaque, you can dampen your brush to build up the intensity.
How I wear it: I love to use this wet with a 242 brush all over my lid. Be cautious when you use this, I have had plenty of pigment explosions happen in the past!


I am also a huge fan on Vanilla pigment. This is the key to
the "angel eye" look, I love applying it all over the lid with winged
liner. If you have blue eyes, put a little but of this in the inner corner. You
will be amazed at the results!

How I wear it: I will typically use this to highlight the inner corners. This color is so beautiful by itself; you could blend it on to the lid with a little mascara and be finished!


Cork is the number one color to have on hand for a natural
eye. Shroom on the lid with cork in the crease makes a beautiful natural look.

How I wear it: I use this in the crease for a natural look and on the lid if I want it to be a bit more dramatic. The 239 brush is perfect to use with Cork!


I absolutely adore Embark for a smokey eye. This color is
so versatile; you could use it for lining the eyes, cutting your crease color,
or popping it all over the lid.

How I wear it: I would have to say that I use this to set a liquid/gel liner or by itself as a liner. It will set off all eye colors, especially lighter eyes.


Finally, MAC's all time best seller when it comes to eyeshadows is All The Glitters. I cannot say enough about this color; it can be the base for looks or it can be a sheer wash of color. Either way, this works well with any eye color and skin-tone.

How I wear it: I tend to wear this as a lid color when I want a soft look.

That summarizes my favorite MAC eyeshadows! MAC is an amazing brand, but the never ending range of colors can be confusing to those who are new to it. Even if you have been a MAC lover forever, it is always fun to see other's favorites! Tell me in the comments if you can pick your favorite, and feel free to request a post! Thanks for reading!


Tuesday, September 4, 2012

Neutral Eyes For Under $20.00

Hey Everyone!

     Today's post is going to be another tutorial, and I have been wanting to do this one for a while. This is not the twenty dollar makeup challenge, but I thought I should do something featuring drugstore products. This is a fairly basic neutral eye, and it will go with any look. Let's get started!


Base: I am going to start by applying a shimmery base all over my lid. This is Dawn from the elf studio line, and I am using it as a primer. I applied this with an elf concealer brush, but any densely packed synthetic brush will do. This color is a really pretty gold with a slight lavender base, so it will work on all eye colors.

Highlight: Next, I am going to work on highlighting the inner half of my lid. This is bringing in more light to my eyes, making them appear larger. I used Cover Girl's Champagne eyeshadow with a 213 brush and softly blended it in. You could use the elf shadow brush for a 213 dupe.
Outer V: If you want to make any neutral look pop, use a darker brown to define the outer "V" of your eyes. I used the Cover Girl Brown Smolder eyeshadow for this step, and it really pulled everything together! I applied this with a 239 brush by patting it down, and then blending it out. Make sure to blend this into the crease, it is a mistake proof way to make sure that you don't over-extend your eyeshadow.


Eyeliner: I am keeping this pretty simple, so I used the elf cream eyeliner in Metallic Olive for my upper lash line. I prefer to apply cream liners with an angle brush, and gel with something comparable to a 210 brush. This allows me to get a really clean line, and fill in any gaps by my lash line.


Mascara: The final step for this look is a coat of mascara! I finished it off with the elf waterproof mascara, the smaller brush lets me coat my lashes from the base.


My favorite part about this is that it looks amazing in any lighting. The shimmer in the highlight color is brightening, not chunky glitter, which is essential to any natural look. Tell me in the comments what your favorite product that is under $10.00 is, and make sure to follow. Thanks for reading!


Saturday, September 1, 2012

Stars N' Rockets Smokey Eyes

Hey Everyone!

     I am so sorry I have been missing, I have had a crazy week! I thought I would come back with one of my favorite posts: a tutorial. This is sort of a crazy look, but I have been wanting to do a smokey eye with a black base for a while. This is featuring Stars N' Rockets eyeshadow, it is an all time favorite of mine. Keep reading to see my go to way to wear it!

The first step is to take the NYX jumbo eyeshadow pencil and apply this all over your lid and smudge it on the lower lash line. I did not worry about precision at all with this, you can just smudge it on. These shadow sticks are amazing, they are great as a base. I used my ring finger to buff out the harsh lines, and it created a seamless primer.


Next, I applied Stars N' Rockets all over my lid with a 239 brush. This is such an amazing color, It is a purple-pink on its own, but it turns into a deep purple-blue when you layer it over a black. I just used my brush to pat the color down wherever Slate was, they make an incredible combination.


I wanted to have the lid color stand out, but the crease did need to be defined. I decided on Satellite Dreams because it will work with the products I used, and it will add a little more color. Make sure to blend this out, the key to any look is to blend. Most looks need some attention in the middle of the lid and the crease, so make sure to use small circular motions. I used a really light hand with a 224 brush for a flawless look.

Stars N' Rockets is such a unique color, I was shocked when I found the same sheen in an eyeliner! This is the Urban Decay 24/7 eyeliner in Ransom. I applied this to my outer half of my lower lash line, my upper lash line, and the outer fourth of my lid. This is just dark enough, I can use it as an eyeliner and my outer corner color. I blended this out with a 214 small smudge brush.


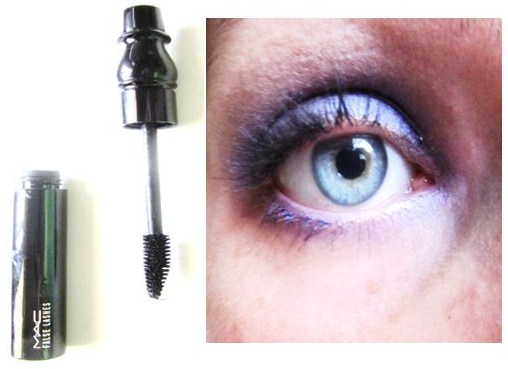
I finished off this look with Mac's False lash mascara for sky-high lashes. This is the final look, and I love it! This would be great to wear for a night out, and you can just apply Slate to the outer third to tone it down.

I have been working on a new way to show the pictures, so tell me in the comments how you like it. I love it because I can show the steps in only five pictures, and you can see my application technique throughout the process.


Tell me in the comments if you have Stars N' Rockets, and if so, what is your favorite way to wear it? I also want to tell you to keep an eye out for my latest collection post, I have re-organized everything and I love it! Feel free to ask for a post in the comments, and check out our contact us page for any questions. Thanks for reading!


Tuesday, August 28, 2012

Vintage Look

Hello Readers!
Perfectly Pink and I are obsessed with a bold red lip, and I love how it just really pops. So I toned down the eye makeup, so that the red lips pop even more, and when I was done I realized it look vintage! Like in those old movies...

First, prep your eye lid with urban Decay's Primer Potion. I like to use this in all of my looks, because it keeps you eye makeup on forever, or until you take it off!


Next, take Orb from Mac Cosmetics and put it all over the lid. Its a really light tan color, its great for a simple base.It can also be put all over the lid with a swipe of mascara to create a cute look that's easy if your running late. It's a lighter color, which isthing that I love about this look is that it starts with a really light color, and we keep layering darker and darker colors.

Then put modelette in the crease. Don't put a lot in, because there is much more layering to be done in the crease after this! This is one of my favorite Mac eyeshadows, it's a great brown because it's not too light that it doesn't really make a difference, but it's not overly dark either.


Now to the same thing with Naked Lunch, just keep layering it up towards the eyebrow. But there is no need to go all the way to the eyebrow! Unless you want to of course...


Next slightly out Patina on top of that, and by putting it on top I don't mean completely covering up Patina, just keeping bringing the look towards the eyebrows. (But you don't have to go nearly that high!)


And finally, take cork and put on the final layer, and put some in the inner corner if you want. That creates a darker look, but I preferred to keep it light so I didn't put it in the inner corner. Try to keep the eye look as light as possible, so the lips will really pop.


And to finish off the eyes, you need some long black lashes! The best mascara to do this with is Mac False Lashes. It is the best mascara to get the long black dramatic lashes!


Then, to top it off with a bold lip, use Tart Fiery Matte Lip Tint. This is amazing! It is a deep bright red, it works better than any other lipstick I have ever tried... I suggest that to get a really neat line, use a lip brush, because the tip of the lip tint is rather thick. If you want to make it glossy you can add some lip gloss on top, because this is really matte.

Try taking some pictures of yourself outside with this look, you will be amazed by the results! Perfectly Pink and I did this look for some pictures and it was amazing!


Comment and tell me what your favorite lip product is to create a bold red lip! And follow us already is you already haven't!


Saturday, August 25, 2012

Two Step Eyes + My Quick Tips

Hey Everyone!

     I have come across my new go-to color for a soft, natural eye, and it is Mac's Cork. This soft brown is amazing with any look, but I have been loving it on its own. Typically I am all for the looks that have fifty steps, but this is so pretty by itself, I don't want to mess it up!

Cork is a really soft camel brown, and it is so easy to apply. I just buff this in all over my lid with a 217 and then create a little more definition in the crease by applying this with a 219. By using only one color, it looks like I have spent hours creating the perfect look. The key to any makeup look is to add depth to the eyes, and this is the perfect color for that.


Finish this off with a little mascara and you are done! You can actually add two to three coats of this if you want to wear this out at night, but one works for me during the day. Make sure to use a thickening mascara, it will add the perfect touch.


For the face, the 182 buffer brush is a life saver. You can apply any powder foundation within seconds and have it blended in perfectly. Make sure to use this in small circular motions around your face for the most flawless coverage. I use this with my mineralized skin finish natural in light-medium.


The best way to easily finish off a neutral look is to add a pop of color in a gloss. This is Lychee Luxe from Mac, and it is the perfect coral-pink. This has these really tiny flecks of golden shimmer to it, which makes your lips look fuller.


That is my favorite way to create a fun look in minutes! Make sure to tell me in the comments what your effortless look is, and make sure to follow. Thanks for reading!


Sunday, August 19, 2012

My Favorite Dark/Bold Lip Products

Hey Everyone!

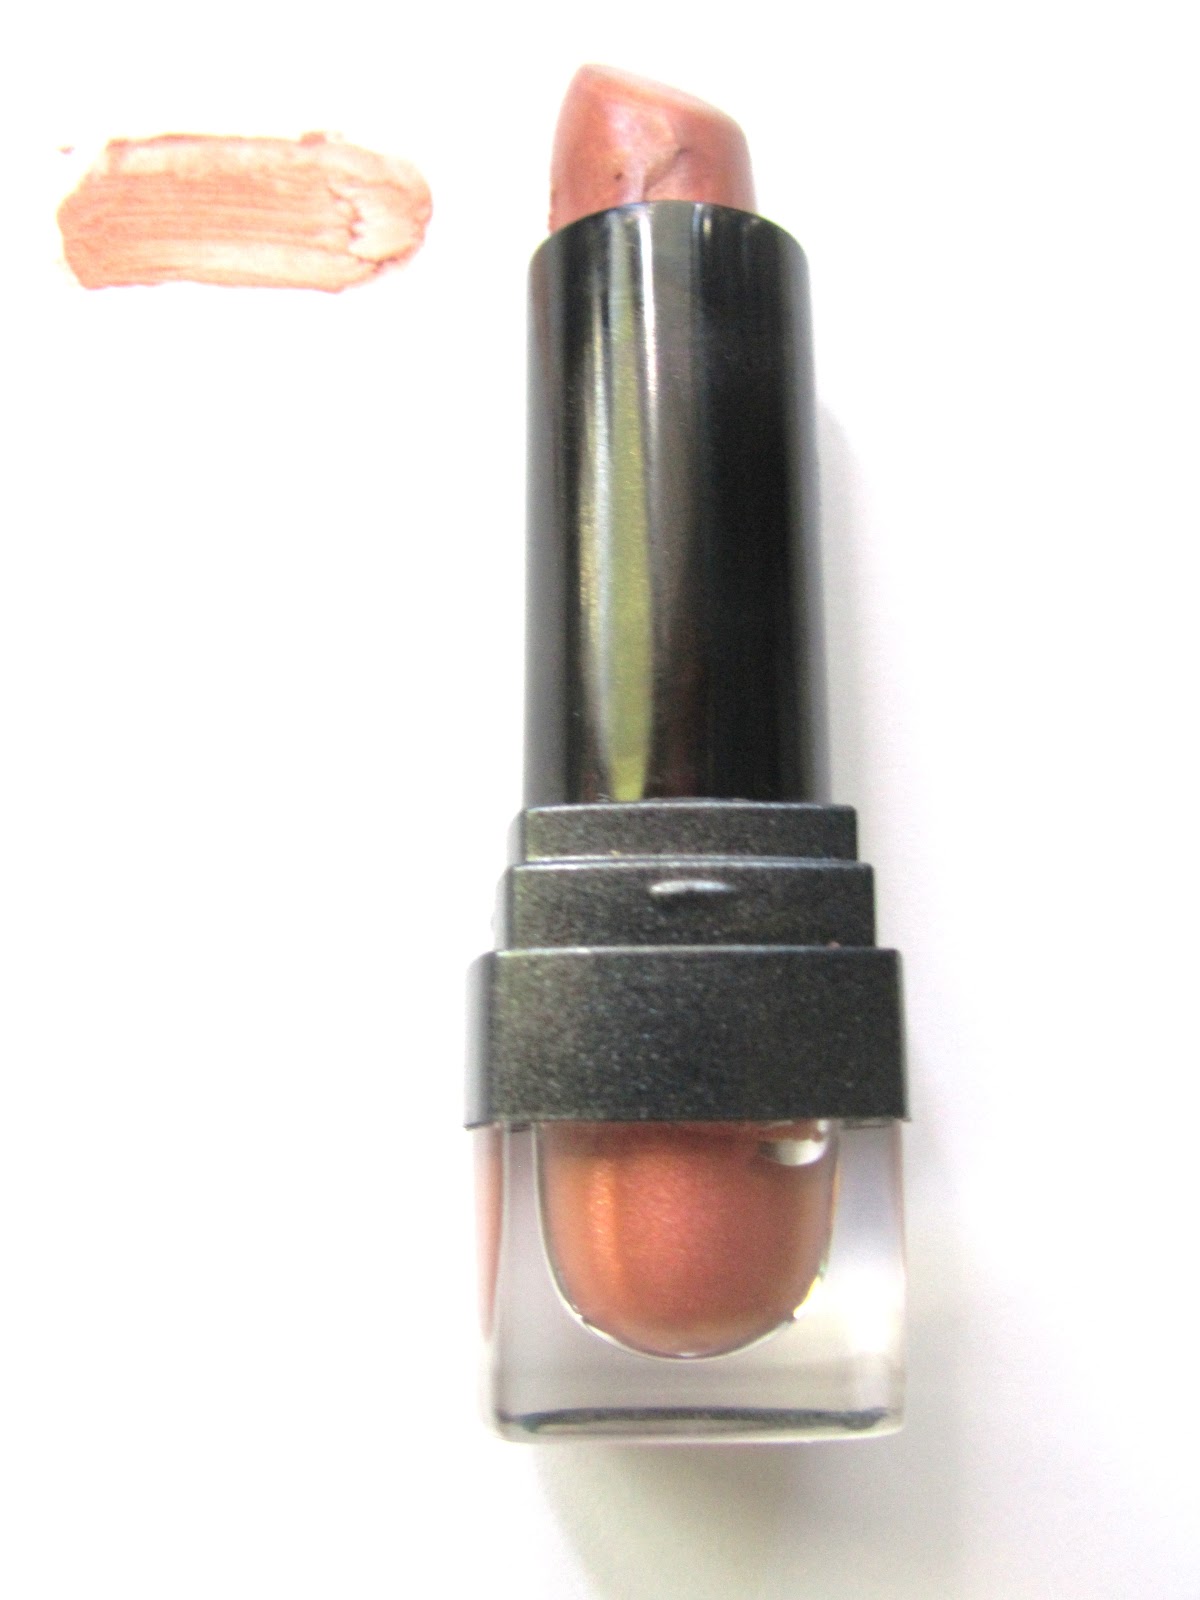
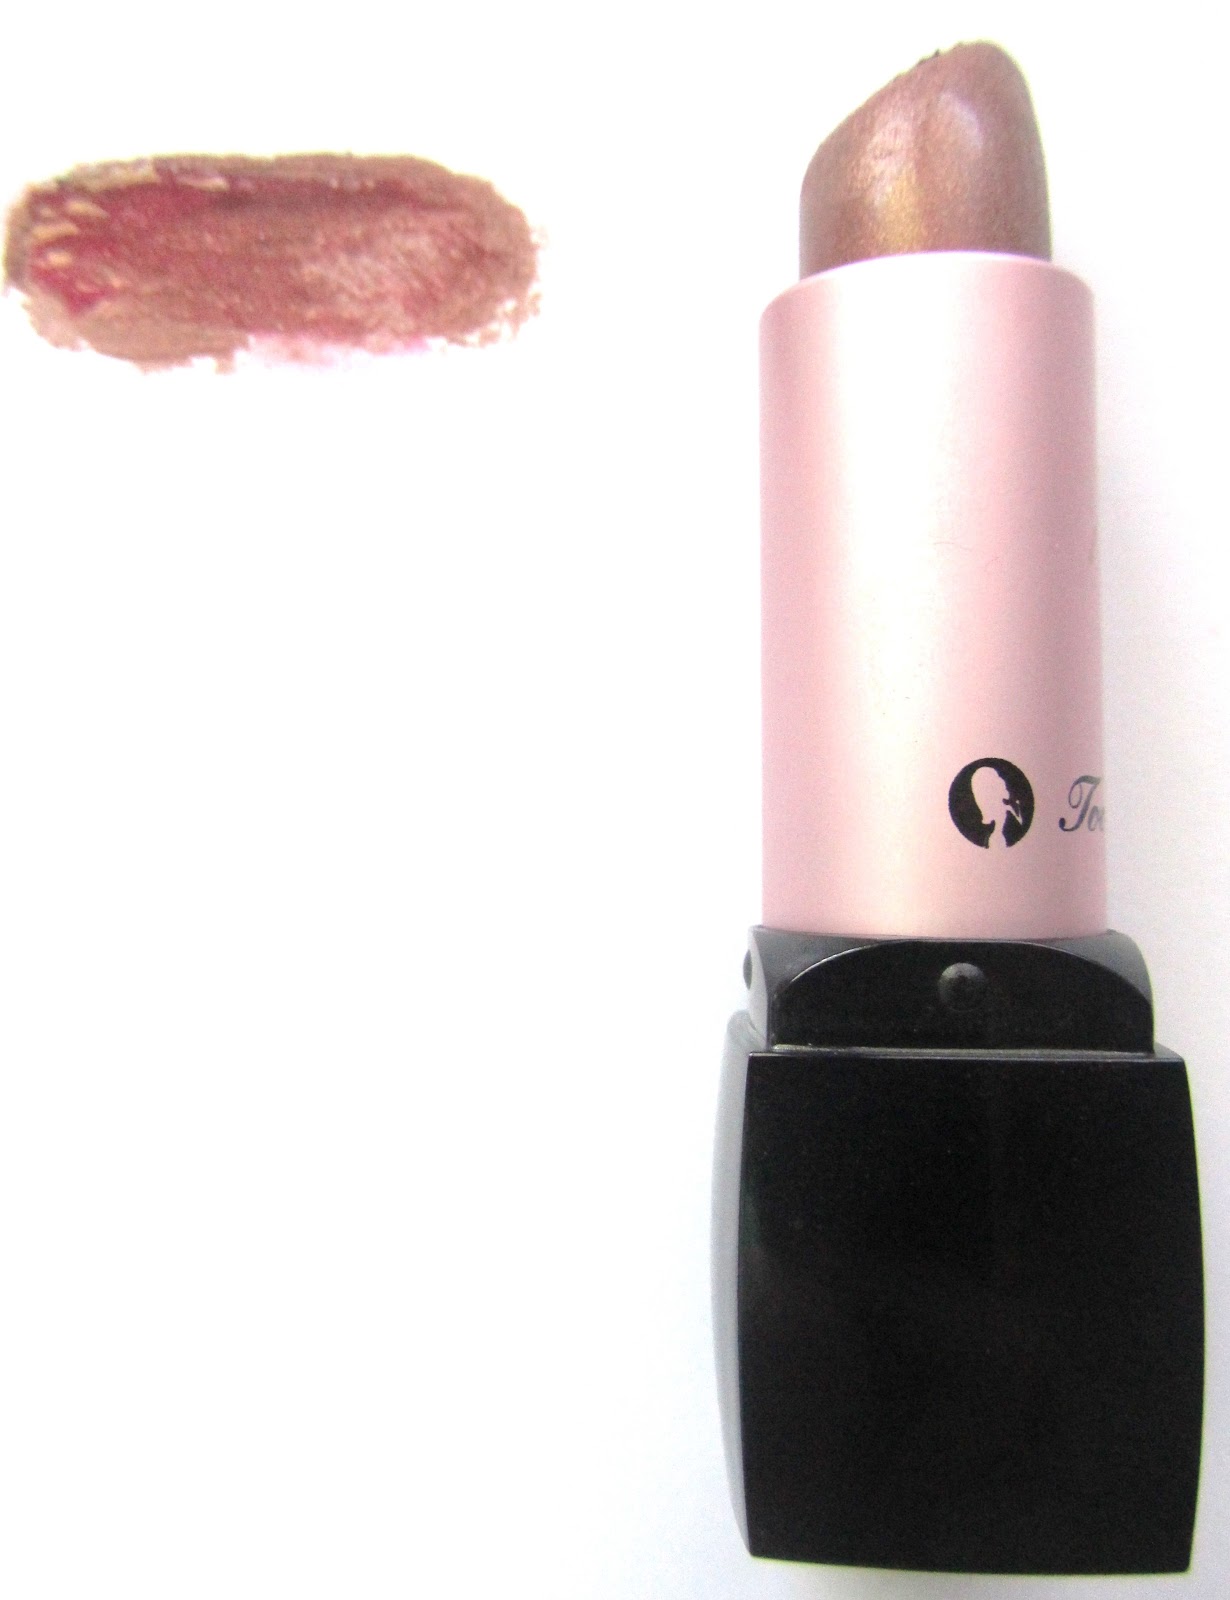
     Glitter Girl and I have a new obsession: bold lip colors. Not only do they photograph beautifully, but you can apply these pretty quickly to pull your look together. I would wear any of these with my neutral eyes look, or any other natural makeup. I swatched the color to the left of the product, so check those out as well!

My first pick is more of a darker lip, it is Mac's Morning Coffee lip pencil. This is a deep reddish-brown, and it will work with any skin tone. You could top this off with a sheer neutral gloss, or you could make this even deeper with something more opaque. This is a pro long-wear lip pencil, this seriously stays on all day without budging. I like to apply my EOS lip balm to the middle of my lip so I can smudge the pencil around more. This will also lighten the color up in the middle, creating a highlight.


If you are looking for a brighter lip, I love the Basic Red Chromagraphic Pencil. This is so opaque and creamy, the texture of it is incredible. This is a limited edition product, but most CCO's have it. This is more of a orange based red, so it is a nice change from the basic blue based red. Chromagraphic Pencil's are typically a Pro product, but they came out in the Mac For Fall Color collection last fall, so check it out at your nearest outlet!


 My favorite opaque red gloss is Cherry Shine from Sephora. This is a really deep ruby red with a hint of sliver shimmer to it, and this works for layering or on its own. This has SPF 8 in it, so it does include some protection. I love wearing this with a softer shimmery color on my lid and black liner, it is so simple and easy to do if you are in a rush.


Bright pink's can be really flattering on cooler skin tones, but Blossom by BH cosmetics is universally flattering! I love layering a sheer pink over this, you can customize it by putting your favorite sheer lipstick/gloss over it. The BH cosmetics lip liners are waterproof, so they will last throughout the day.


If you want a really bold, opaque, matte red, my favorite is the Tarte fiery Lipsurgence natural matte lip color. This delivers an opaque layer of color in one swipe, it is the perfect blue based red. I actually got to try this in one of the Sephora Beauty Insider Sets, and it has been one of my favorites ever since. This does have a chunkier, round tip, so make sure to use a brush around the edges for the most precise application.


My next favorite is not really bold or a darker color, but it is definitely unique! It is the NYX Black Label Lipstick in 165 Pewter. This is the strangest coppery bronze, but it is actually a really pretty sheer copper. I do not understand why this is called Pewter, the color is the complete opposite. Anyways, this is my favorite color when I want to add a sheer, bronze sheen.


My final deeper lip color is Too Faced Cougar Lipstick. This is a really deep metallic coppery reddish-brown, and it is a lot prettier then the complicated description makes it sound! This is a darker color, so I like to wear it as more of a sheer wash. I love the packaging on this, it feels really secure. I love wearing Mac's Love Nectar over this, the combined shimmer makes your lips look so much fuller.


These are my favorite lip colors of the moment! I really love experimenting with different colors in Fall, you can get away with deeper lip colors and still look put together. Make sure to follow if you haven't, and tell me in the comments what your go-to lip color is for transitioning into fall. Thanks for reading!
Thursday, August 16, 2012

Golden Glow Eyes


Hey everyone!


     This is my final back to school makeup tutorial, so I thought I would base this on more of a golden natural look. This would be great for an everyday neutral eye, and with a little more mascara, you can easily take this from day to night. This look also works really well with a lot of different lip colors, so let's get started!


Base Color: I first used Bare Study paint pot by Mac all over my lid to create a shimmery gold base. I applied this with a 217 brush and blended up to get a really soft wash of color. This can really brighten up your eyes, so if you want a basic look, you could just use this as your everyday primer.


Lid Color: I w
anted a gold color that was opaque and blendable, so I used Retrospeck by Mac all over my lid with a 239 brush. This has a really fine shimmer to it instead of that chunky glitter you often find in gold shadows, you do not have to put up with the fall out either. When you put this over Bare Study, it creates the prettiest golden glow that will work really well with plenty of crease colors. 


Outer Corner: I applied Cork to my crease using a 275 angled shader brush by Mac. Cork is a really soft and natural warm toned brown, but you can easily build it up depending on how opaque you want it. I also used the 275 to define my outer corner, this added a little shape and it merged really well with Retrospeck. Make sure to blend these well using a 224.


Highlight: I finished off the look with Blanc Type in my inner corners and as a brow highlight using the 219 and 227. I use this color everyday as a highlight, it is the perfect finishing touch to any look. This is also a matte squared finish, which is a really soft form of a matte shadow. This lasts forever because of its texture, and the application is so smooth. You can even add a little of this to the middle of your lid to create the effect of brighter and bigger eyes.


Eyeliner: I used my Tarte Emphaseyes HD liner on my upper lash line. This is really easy to throw in your bag to touch up with throughout the day because it is the travel sized edition, which is only a little smaller then the full sized. This has the perfect fine point to it, which is essential in creating those flawless lines.


Mascara: I decided to use my Sephora Full Effect Mascara for some extra length. The easiest way to take your look from day to night is to add a little mascara and eyeliner. This is the perfect size for carrying with you on the go, and it doesn't clump or smear for easy application. You can also use this on your lower lashes without it smudging down under your eyes. 


Finished Look: This is the final eye look! It is simple, natural, and it will work with plenty of lip and cheek combos. You could add a little of the eyeliner on your waterline if you want to make this more dramatic, or blend a little more or cork on to the outer corner. My main tip for this look is to use a light hand; you can always add more of the product, but it is harder to take it away from a finished look.


That is one of my more natural looks that can be completed in less than five minutes! Tell me in the comments what you do for an everyday natural look, and make sure to follow! Feel free to leave a request for a post, and keep an eye out for my upcoming fall makeup looks. Thanks for reading!


Twitter Delicious Facebook Digg Stumbleupon Favorites More

 
Design by Free WordPress Themes | Bloggerized by Lasantha - Premium Blogger Themes | Premium Wordpress Themes