Showing posts with label makeup. Show all posts

Tuesday, April 9, 2013

Bright Eyes For Spring + Marilyn Monroe Trick

Happy Spring!

Spring is the perfect time to start bringing out the brighter colors. I wore this look on a shopping trip with some friends and received a ton of good feedback on it! I feel like if I put more time into eyeshadow with colors, people tend to recognize it more than time spent on neutrals. Seriously, the professional at Sephora was going nuts over this.. Keep reading to see how I achieved it!

Is it just me, or is this a pop of color? I feel like it is the perfect way to branch out into brights.


Yes, I went back into the Marilyn Monroe makeup basics. Her classical look an be adapted into just about anything!

We know what she is thinking there.. Might as well add a speech bubble. I went a little bit overboard on the graphics here; I was having too much fun!

Tell me in the comments how you wear bright colors. Also make sure to let me know how you like the latest picture format! Thank you for reading!

Perfectly Pink


Monday, February 18, 2013

Winged Eyes and Orange Eyebrows... Wait, what?!?

Yes, I did a double take of the title was well. Disclaimer: this look was not worn in public. Do not try this at home.

Why did I try this? Great question. The Forever Fuchsia team was working on some new looks for posts and we came up with a challenge. Our logo designer picked out a certain number of products for each of us to try and we had to create a look with it. After looking at my kit, I knew there was no hope for the natural look. The madness is explained.


Fabulous, right? This actually was not that difficult to do; the products blended well. The eyebrows are actually the NYX lip pencil in Pumpkin, and the eyes came from a combination of MAC's Hi-def Cyan and NYX Jumbo shadow pencils.


Even though it is strange, I still get points for creativity! Tell me in the comments if you have ever attempted the colored eyebrows trend, and if so, how did you make it work? Thanks for reading!


Thursday, December 27, 2012

Blue and Purple Ice Eyes


I am really excited. More like extremely happy. Your question of the moment might be, why? My reason is simple: I finally paired blue and purple eyeshadow together. And it worked. Yes, I understand that this is not major news, but it is amazing for me! I have always added either blue or purple to a look. I have finally conquered my form of impossible and put them together. I need to get some new hobbies.

Anyways, let's go ahead and get started!


Start by priming the eyes. I decided on MAC's Nubile paint pot to give me a neutral base.


                                                                        Next, apply a shimmery lavender shade all over the lid. I used to have issues with lavenders; I felt as though they were too youthful. This isn't necessarily a bad thing, but I did not want to get stuck in that Libby Lu makeup rut. By pairing this soft purple with bold blues, it makes it more of an elegant accessory.


I wanted to incorporate a brighter pop of color, so I used MAC's Freshwater. This look can be worn any time of the year, but you all know how I love my seasonal makeup! I used a small strip of tape to ensure that I would get a clean line of shadow. Make sure to stick the tape on the back of your hand a few times to make it easier on the skin. This removes any added tackiness to the tape which can pull at the skin causing premature wrinkles. I applied this with an angled shadow brush to my crease in a cat eye motion as well as the outer half of my waterline.


To finish off the cat eye wing, apply a thin line of a bright blue liquid liner to the upper lash line.


I combined MAC's Deep Truth and Satellite Dreams to set the eyeliner. This was easily applied with an angle brush to get the winged curve.


Blend out Freshwater with a blending brush, or use another color to fade it out. I used Stars n' Rockets with a fluffy crease brush to blend the colors out. This shade has a beautiful blue duo-chrome to it, making it more blendable.


I wanted to save the highlighting for last to get that fresh glow to the eyes. I first applied an white, opaque cream shadow to my brow bone and inner corner and then set it with a soft pink pigment. The iridescent shimmer in the pigment will catch the light, making you look wide awake.


Add mascara and the look is complete! Tell me in the comments what your look has been this winter, and make sure to follow. I am also excited about the forever fuchsia twitter account; it is a great way to interact with you all! Leave your twitter username in the comments if you have one so we can follow you!

 I have been using a different software to upload my pitures and post them. I also recieved a camera that I have been using for this post; is the quality better? I feel like you can really see the colors now, I love it! Feel free to request a post, and thanks for reading!


Monday, November 19, 2012

Fall Favorites


Hello Readers!
I am so sorry I have been absent from Forever Fuchsia, but I promise that this week I will try and post every day! So, back to the subject, fall is finally here, and with it my list of fall favorites! So let’s get started!

First off is Mac’s matte blush Melba.  This is my favorite blush for a dance or a night out, and it is versatile. If you apply it with a brush just one layer, it can be sheer and natural, but with many layers it can easily look more pigmented.  This is perfect for a school dance or a night out. Wear a thin layer to add a bit of color to your face. My favorite brush to use to apply this blush is Mac’s 129 brush because it is round, so it is easier to apply blush. I love Mac’s brushes because they are great quality and the bristles are exceptionally soft on your face.


Next is Rusted Rose from Sephora’s line of lip gloss. It is a classy rose color that can be used to add some sparkle to a look.  I love this lip gloss because it can go from daytime to nighttime with a simple swipe of lip gloss. But it does get rather watery which can get a problem if you are trying to put it on thickly, so use a matching lipstick or lip liner under this, and just use Rusted Rose to add sparkle.


Nicole by Opi’s The Next CEO is in my opinion one of the best nail polish colors made by that company.  I consider nails to be an accessory, and this is my favorite way to make nails noticeable, but not gaudy. It looks sparkly in the bottle, but when on the nails it is a light metallic gold. This nail polish rarely chips within two days, with two layers and a good top coat. This is definitely my new go to nail polish!


I know this is rather short, but if you want a Fall Favs part 2 post, comment and tell me! Also if you have any business inquires or something you want to tell the Forever Fuchsia team in private, email us at foreverfuchsia@gmail.com. Feel free to comment and tell me what your fall favorite is, what you think of these products, and posts requests!


Saturday, June 2, 2012

Tropical Eyes

Hey everyone!

     Thank goodness finals are over! It has been one interesting week, and now I can get back to my normal posting schedule! Anyways, I thought it would be fun to do a tutorial on a tropical look. In the summertime, you can get away with colorful looks. I have been loving this look, so here it is!

Instead of starting off with Urban Decay primer potion like I usually do, I am going to use a paint pot. This will give you a colored base, and it will make your shadows stay all day long!


Next I took Lucky Green with a 239 brush and applied it to the outer half of my lid. This green has a little yellow shimmer in it, so it works really well with the paint pot! Also, make sure to get all the way into the upper lash line, the yellow under it will show unless Lucky Green is smudged into the lash line! Then I put this on the inner half of my waterline for more color.


Freshwater is the clearest summer blue that I could think of, so I just had to use it! I used the 213 brush to apply this to the outer "V" also known as the outer third of the lash line following up to the crease. I prefer the 213 instead of a pencil brush because the 213 blends it better. I don't like the look of a harsh line in the crease! After that, I applied this to my un-lined outer half of my waterline. I blended these colors in the center for added definition. I also used this on my upper lashline.


I used the 224 and Blanc Type to highlight my browbone. I do this every time to lift up my eyebrow and make my eyes appear bigger!


I then used Mac False Lash mascara. You know I love this stuff, it works wonders! This formula is perfect, it is not too dry or way too wet. I love it because it holds without flaking all day!


Because this is a summer look, I need to pull off a tan! I used Nars Laguna bronzer with a 168 brush to contour my cheekbones and slightly warm up my face. I like to build the product from the outside of the face when it comes to bronzer, because you contour instead of creating a fake look. If you start the bronzer in the middle of your face when you don't have your perfect tan, it won't look good. If you start from the outside, it is much more natural!


And this is the finished look! I love the waterline in this look, and I think the yellow really brought out my eyes! This will work on any eye color, but it will really make blue eyes pop! Sorry my eye is kind of red, I have been messing with different looks and annoying them all day!


Thanks for reading, and leave a comment telling me if you tried out this look! I really had fun with this one, I cannot wait to do more summer makeup looks! Feel free to request any posts, I promise there are many more posts coming up!

♥ Perfectly Pink

Sunday, May 27, 2012

Waterproof makeup!

Hello Readers!
One of the dangers of swimming in a pool is that if you don't remove your makeup before you jump in, your makeup might get all over your face in places you don't want. but there is a simple and easy solution to this! Waterproof makeup! So today I'm going to show you some of my favorite waterproof makeup.

First is Urban Decay's Primer Potion. Put this on before you apply any eye makeup, and your eye makeup will stay on all day even if you go in water!

 Probably the makeup that runs the most in water is mascara. I don't know if you watched this years Miss America Pagent, but when Miss America won she cried and her mascara when everywhere. She should have used Mac's Splashproof Lash Mascara. This mascara is waterproof, and gives you a very natural look.
Splashproof Lash

Next is Smashbox's Limitless Waterproof Liquid Liner Pen. If you use Urban Decay's Primer Potion you don't need waterproof liner, but it's always nice to stay on the safe side.
LIMITLESS WATERPROOF LIQUID LINER PEN
Finally, it's very hard to get waterproof makeup off because, well, it's waterproof. but Nar's Makekup Cleansing Oil.It's a very good makeup cleanser, it's gets everything off, and it works on waterproof makeup too.
Makeup Cleansing Oil

I hope you liked this post! Feel free to comment and tell me what you think!
--Glitter Girl

Sunday, March 18, 2012

Blink, Blink!

Ever wonder how some people just have that huge wide eyed affect? Their lashes look super full and their eyes are huge. This is caused by a very nice special effect beauty product, false lashes! I hardly ever wear false lashes, they do take practice to apply. I use them on clients sometimes who have a big event and need something extra. I will show you my go to pairs to use on them!

My favorite brand to use is Ardell because you can re-use them. They are also the easiest to apply in my opinion. The ardell 110 in black are great starter lashes, they give length and thickness.


My next favorite pair is the Ardell 109. These are not super thickening, but they do add a ton of length! This helps you eyes look more awake.
Also, the lash band blends in with your eyeliner perfectly, it just gives it another layer of definition!


This next pair is super natural. It is the ardell 301, and it gives a ton of definition to your outer corner! These are super natural and very wearable. All you need to do is smudge your liner into the band to give you the bambi eyed affect!


I hope this post is helpful, comment and tell me what your favorite lashes are!
-perfectly pink

Thursday, March 15, 2012

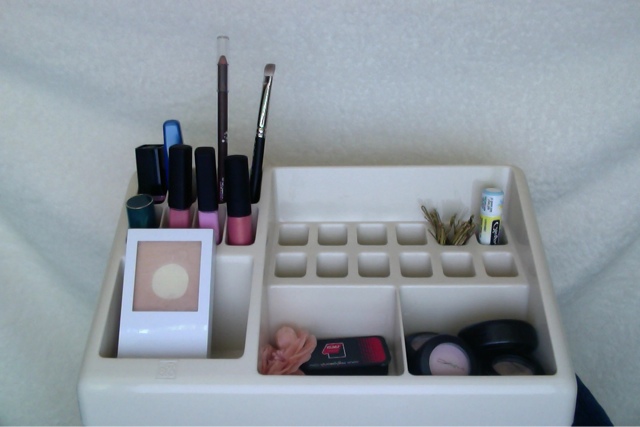
On the Go Beauty Bag

Hey everyone!

     Glitter Girl and I were talking today about what to put inside your beauty bag for the gym/work/school/whatever! Here are my must haves for any beauty bag.

MAKEUP
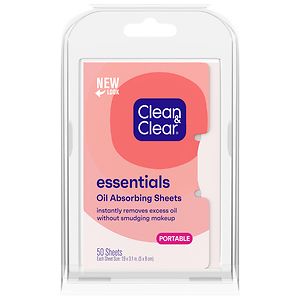
Blotting Papers: These are great for when you do not have time to re-do your makeup but want to control the oil. They are perfect to throw in any touch up bag because they are super small, cheap, and easy to use!

Concealer: This usually wears off in about four to five hours so it is important to touch up. I would bring a small brush along with you to make sure that you have the best application you can get!

Skin toned powder: This is a complete necessity for anyone who wants their face to stay matte and flawless all day! This will make everything stay on longer so be sure to put the powder on top of your makeup once you are done applying. For an on the go touch up, I would use a pressed powder instead of a loose powder because loose can create a mess! Also, I would carry a kabuki brush or a large powder brush with you.

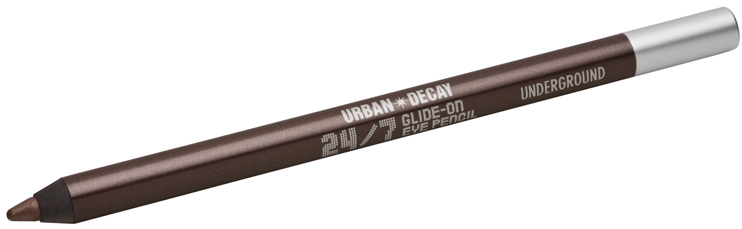
Eyeliner: For this purpose, I like to carry a brown color with me because you can smudge it and still make it look natural! I also like to carry a white to line the waterline with.

Eyeshadow: I would bring one neutral color. Keep it simple, you can always create a more dramatic eye with your liner.

Lips: I would use a lipgloss for an on the go product. Lipstick, especially if you are wearing a darker color, can take longer to touch up. Lip liner usually hangs on for pretty long but it does take a while to touch up, so I prefer gloss. A neutral is great from smashbox or mac.

HAIR
Hairbrush: A mini one will do, really anything that gets the job done works!

Hair clips/pins: Bobby pins, clips, hair bands, anything that you use to get your hair back and out of your face will be great for this!

Mini hairspray: Obviously do not carry around a full sized one, but one that is the right size is a life saver for anyone who needs to tame fly-aways.

EXTRAS
Perfume: A mini perfume is always nice to have with you when on the go! You can get them free with any order from sephora so this is where I get most of mine from.

I did not have room to put all of my product recommendations for the makeup with the product so I will list those down here! You all know what your favorite hair ties and perfume and stuff is so I will not put those down here!

Blotting papers are super cheap, so I love the ones from clean and clear. They do a great job of removing all of the extra oil off of your face and making it matte.


My favorite concealer is from mac and it is the mac select cover up. it has a really great moisturizer in it so it will not get all cakey on you.


Pressed powders are really different for all skin types, but I have dry combination skin. I love mac's mineralized skin finish natural.


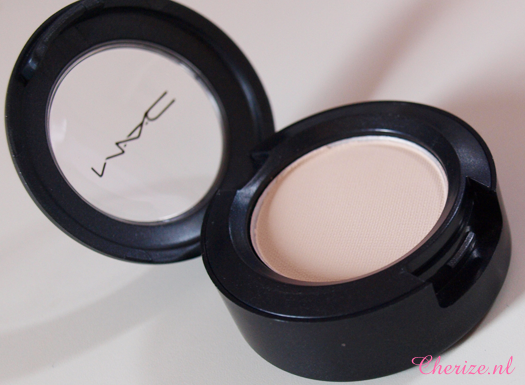
For eyeshadow, I would use mac's blanc type. It is a matte light pink/tan color, and looks really natural.


For eyeliner, I love urban decay's 24/7 eyeliners. They glide on and are super natural. This is the pencil in the shade underground.


Smashbox and mac both have great lipglosses. From mac, my favorite is love nectar, it is a light peach with gold shimmer. It looks very natural. From smashbox, Glitter Girl and I agree that pop is the perfect color for a natural glaze.

I love these for on the go! Tell em what your favorites are in the comments!
-Perfectly pink.
Love nectar is down below!


Twitter Delicious Facebook Digg Stumbleupon Favorites More

 
Design by Free WordPress Themes | Bloggerized by Lasantha - Premium Blogger Themes | Premium Wordpress Themes