
 Sunday, October 28, 2012
 Forever Fuchsia

Hey Everyone!

I seriously thought I had more time to get these Halloween tutorials out, but it is coming up too soon! I had to narrow the tutorials down to one, so I apologize in advance for the looks that have not been posted. I have always loved the "Barbie" look, so I had to do my dream tutorial! Keep reading to see my Barbie transformation.

I wanted to start with a white/pink base that will open up my eyes and make them appear larger. I decided on MAC's Let's Skate paint pot because it is a gorgeous golden pink that is full of glitter! How could it become any more Barbie-ish? Apply any shimmery color all over your lid and stop it right when you get to the crease.

You can really use any colors that you want, but I decided on the pinks and periwinkles to make the classical Barbie. I wanted to bring out the golden flecks of glitter in the paint pot, so I applied MAC's Expensive Pink with a fluffy blending brush all over the lid.

I wanted to make my eyes huge, so using cosmetics for special affects can come in handy. Makeup is all about bringing shadows and light to your face, so I applied a little of MAC's Vanilla pigment to the inner corners of my eyes. This will make them seem larger because the light will come in and reflect the pigment, making them appear much bigger. I also added a BH Cosmetics single shadow in a bright pink to the crease and lower lash line to add an extra Barbie touch.

Barbie's deep set eyes can be tricky to create; I decided to go with Poison Pen by MAC to define my crease. You can use some advanced techniques like following the shape of your eye to complete an inner wing, but using a pencil brush with any dark color will give a similar look.

This is the fun part: eyeliner! I wanted to create the look on huge, innocent eyes, so I started with a thin line all around. Barbie seems to have perfect makeup, I did not smudge any of the lines to keep it as close to perfection as possible. After completing the line, I winged out the top and added lower lashes on the bottom to make my eyes wider.

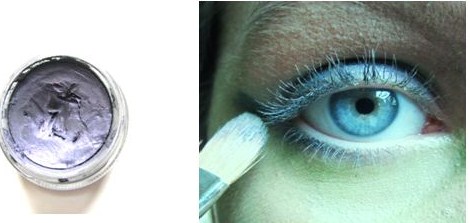
The wide awake look is hard enough to get on an everyday basis; I was contemplating how to achieve this when I needed it at a Barbie level! I decided to use my go-to weapon, MAC's Fascinating Eye kohl. I feel like I use this in every tutorial, it is so simple but it makes such a difference. I applied this to the waterline and exaggerated the inner corners to make the line fluid.

Here comes the scary part: false eyelashes. These look rather suspicious in the product picture, but they look stunning on! I used the NYX falsies and Ardell 105 lashes to achieve this look. These combined make the eyes huge, really make the Bambi eyed look. Yes, I need to come up with better comparisons!

I needed to create some supermodel cheekbones for this look, so I decided to use Shadester and Emphasize from MAC's pro sculpting product line to create them.
I applied Shadester with a 168 brush to the hollows of my cheekbones and then blended the product up. The more that you cast a shadow under your cheekbone, the higher they will appear.
Emphasize is the perfect highlight, it is natural without being too dull, but it will enhance without being full of chunky glitter.

I used my BH Cosmetics 10 professional blush palette to get Barbie's rosy cheeks. I applied the brightest pink/fuchsia in the left row to the apples of my cheeks with a MAC 116 brush. This accented my newly formed bone structure, and it gave my the signature Barbie flush.
I did not mention anything about eyebrows in the previous steps; go ahead and make your brows thinner with a higher arch if you haven't already. I have naturally full eyebrows, so I focused the brow pencil in the middle to make them appear thinner.

Raspberry lip pencil by BH Cosmetics was exactly what I needed to get a bright pink lip. You can use any shade of pink for this; I just decided to go bolder for the tutorial.
Sorry for the obnoxiously full lips in this picture; it stretched a little to far when I was putting the pictures together! You can make your lips as full as you want for this look, but keeping the normal shape is fine too.

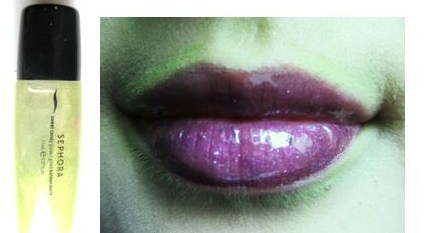
To finish off the lips, I applied MAC's Snob lipstick to the center with a 316 brush. This had a slight ombre look to it, which completed what I was going for. Finish it off with a clear gloss and you are done!
That is how turned myself into a human barbie doll!
I am so sorry this came out so late; if you are still searching for a Halloween look hopefully this helps. Make sure to check out my Fairy Dust and Green With Envy Halloween tutorials for some added inspiration. Have fun with these looks, and Happy Halloween!


I seriously thought I had more time to get these Halloween tutorials out, but it is coming up too soon! I had to narrow the tutorials down to one, so I apologize in advance for the looks that have not been posted. I have always loved the "Barbie" look, so I had to do my dream tutorial! Keep reading to see my Barbie transformation.

I wanted to start with a white/pink base that will open up my eyes and make them appear larger. I decided on MAC's Let's Skate paint pot because it is a gorgeous golden pink that is full of glitter! How could it become any more Barbie-ish? Apply any shimmery color all over your lid and stop it right when you get to the crease.

You can really use any colors that you want, but I decided on the pinks and periwinkles to make the classical Barbie. I wanted to bring out the golden flecks of glitter in the paint pot, so I applied MAC's Expensive Pink with a fluffy blending brush all over the lid.

I wanted to make my eyes huge, so using cosmetics for special affects can come in handy. Makeup is all about bringing shadows and light to your face, so I applied a little of MAC's Vanilla pigment to the inner corners of my eyes. This will make them seem larger because the light will come in and reflect the pigment, making them appear much bigger. I also added a BH Cosmetics single shadow in a bright pink to the crease and lower lash line to add an extra Barbie touch.

Barbie's deep set eyes can be tricky to create; I decided to go with Poison Pen by MAC to define my crease. You can use some advanced techniques like following the shape of your eye to complete an inner wing, but using a pencil brush with any dark color will give a similar look.

This is the fun part: eyeliner! I wanted to create the look on huge, innocent eyes, so I started with a thin line all around. Barbie seems to have perfect makeup, I did not smudge any of the lines to keep it as close to perfection as possible. After completing the line, I winged out the top and added lower lashes on the bottom to make my eyes wider.
The wide awake look is hard enough to get on an everyday basis; I was contemplating how to achieve this when I needed it at a Barbie level! I decided to use my go-to weapon, MAC's Fascinating Eye kohl. I feel like I use this in every tutorial, it is so simple but it makes such a difference. I applied this to the waterline and exaggerated the inner corners to make the line fluid.

Here comes the scary part: false eyelashes. These look rather suspicious in the product picture, but they look stunning on! I used the NYX falsies and Ardell 105 lashes to achieve this look. These combined make the eyes huge, really make the Bambi eyed look. Yes, I need to come up with better comparisons!

I needed to create some supermodel cheekbones for this look, so I decided to use Shadester and Emphasize from MAC's pro sculpting product line to create them.
I applied Shadester with a 168 brush to the hollows of my cheekbones and then blended the product up. The more that you cast a shadow under your cheekbone, the higher they will appear.
Emphasize is the perfect highlight, it is natural without being too dull, but it will enhance without being full of chunky glitter.

I used my BH Cosmetics 10 professional blush palette to get Barbie's rosy cheeks. I applied the brightest pink/fuchsia in the left row to the apples of my cheeks with a MAC 116 brush. This accented my newly formed bone structure, and it gave my the signature Barbie flush.
I did not mention anything about eyebrows in the previous steps; go ahead and make your brows thinner with a higher arch if you haven't already. I have naturally full eyebrows, so I focused the brow pencil in the middle to make them appear thinner.

Raspberry lip pencil by BH Cosmetics was exactly what I needed to get a bright pink lip. You can use any shade of pink for this; I just decided to go bolder for the tutorial.
Sorry for the obnoxiously full lips in this picture; it stretched a little to far when I was putting the pictures together! You can make your lips as full as you want for this look, but keeping the normal shape is fine too.

To finish off the lips, I applied MAC's Snob lipstick to the center with a 316 brush. This had a slight ombre look to it, which completed what I was going for. Finish it off with a clear gloss and you are done!
That is how turned myself into a human barbie doll!
I am so sorry this came out so late; if you are still searching for a Halloween look hopefully this helps. Make sure to check out my Fairy Dust and Green With Envy Halloween tutorials for some added inspiration. Have fun with these looks, and Happy Halloween!