Showing posts with label hair. Show all posts

Thursday, August 16, 2012

The Secret To Silky Smooth Hair

Hello Readers!
     I am always looking for a way to get my hair super soft and silky. One of my favorite ways was to straighten my hair at night, and then go to sleep and when I would wake up the next morning the natural oils would have gotten in my hair so it was silky and straight. I still love to do it that way, because it does work the best so far, but I have also found an amazing shampoo!
     Finesse makes amazing shampoo's that make your extremely smooth and soft! It also adds alot of volume to my hair. My hair tends to get very dry... So I use Finesse's moisturizing shampoo. It is hydrating, and I could not be happier with it! I don't even use a conditioner with this, because it is kind of like a conditioner and shampoo in one! But there is also a moisturizing shampoo that you can get.  If you try this out you will instantly see a difference, just run your hands through your hair after you put this on in the shower.  If you want to check out their website, click on this link.  http://www.finessehaircare.com/?page_id=8
     But remember, if you want silky smooth hair, don't shower every night, try to do it every other day,  because this allows all of the natural oils to get in your hair! Also, don't overuse heating tools, these really dry out your hair, you can use a heat protectant, but it's always still good to let them have a rest for a little bit. Finally,  when you are using heating tools, put it on a very high setting. I know this sounds like it will dry out your hair more, but actually, when you put it on the high setting you only have to straighten/curl your hair once. If you use a lower setting, then you have to keep repeating it on your hair, which is really bad for it.

I hope this helps you get silky smooth hair! If your have any comments/questions feel free to tell me in the contacts or request a post! Also comment and tell me what your favorite shampoo is!


Tuesday, August 14, 2012

How To Get Soft And Healthy Hair

Hey Everyone!

     In my DIY T-shirt curls post, I got a lot of questions about how I get my hair healthy. The secret to keeping your hair glossy and shiny is simple: treat your hair correctly! Even though I do use heat on my hair, I have been trying to use it less because of my new favorite curling method. Here are the products that I use to help prevent split ends and add a ton of shine!


My first favorite is the Chi Keratin Mist. This is such an amazing product because you can easily add it to your everyday routine, I use this on my hair to stop split ends before they start. Keratin rests on top of healthy hair to protect it, but it will help seal up any damage. This can also be used to prep your hair before you use any treatment masks.


I try to switch up my shampoo's pretty often to give my hair all of the benefits of each individual product, but I keep coming back to Joico K-Pak reconstructing shampoo. This adds so much shine, and it really prevents split ends. This would have to be my number one essential for getting that natural shine, I have also found that this makes your hair so much easier to style.


For my conditioner, I use the TIGI Rockaholic Living The Dream Daily Energy Conditioner. This is gentle enough to use it frequently, and it keeps my hair so soft. This was on sale one time when Ulta was having their 21 days of beauty, so I decided to pick one up. This has to be my all time favorite conditioner, it makes your hair super silky without being greasy, which is a major deciding factor in hair products for me. My definition of shiny hair is glossy, bouncy, full, and healthy. These products will not weigh your hair down, they will just add all of the qualities above!


I use the Redken Outshine as a detangler on my wet hair, and then I let it air dry. This is typically used for adding shine, but it does an amazing job of creating a smooth and sleek look without using heat. If you want it to dry straight, brush through it every ten minutes to keep it flat. If you want to add more of a natural looking wave to your hair, check out the next product!


My go-to product for natural looking waves is the Suave Professionals Captivating Curls Mousse. Suave has really established an amazing range of products, and I have been extremely impressed with their professional line. This is more of a cream then a mousse, and it makes your hair so soft. This doesn't make your hair crunchy at all, but the hold on it is so impressive considering the texture of it! The key to this product is to apply it right after you get out of the shower, and then dry it with your towel.


My favorite heat protectant would have to be the Got 2 B Guardian Angel. I use my Chi 44 iron guard on my hair when I straighten it, but for everyday use, Guardian Angel is my favorite. I mainly focus this on the ends of my hair and then work it up, this prevents split ends and really nourishes your hair.

These are my favorite products that I use to keep my hair looking shiny and healthy! The only products that I always use are the shampoo and conditioner, but keeping the others in your routine will provide you with healthy looking hair, even when you don't use them daily.

And we want to thank all of our amazing followers, we are so excited to get to 100! Make sure to follow if you haven't already, and tell me in the comments how you keep your hair healthy. Thanks for reading!


Sunday, August 12, 2012

Simple DIY T-Shirt Curls

Hey Everyone!

      Recognize us? Yes, Forever Fuchsia got a makeover! We loved the old website, but we feel like this one represents us more, and we could not be happier with it! We are still working out some kinks, so keep checking back to see our latest updates! Anyways, I thought I would do a hair tutorial to kick off our back to school series! If you know me, I usually have my hair curled. Or straightened. Or in some strange style that requires heat. Yes, I admit, I really overuse my heat tools, but I do not feel finished unless I have me hair done! I have tried rollers in the past, but I could never sleep on them, so I went straight to using heat on it. I finally figured out a style that uses no heat, plus you can create the rollers at home!


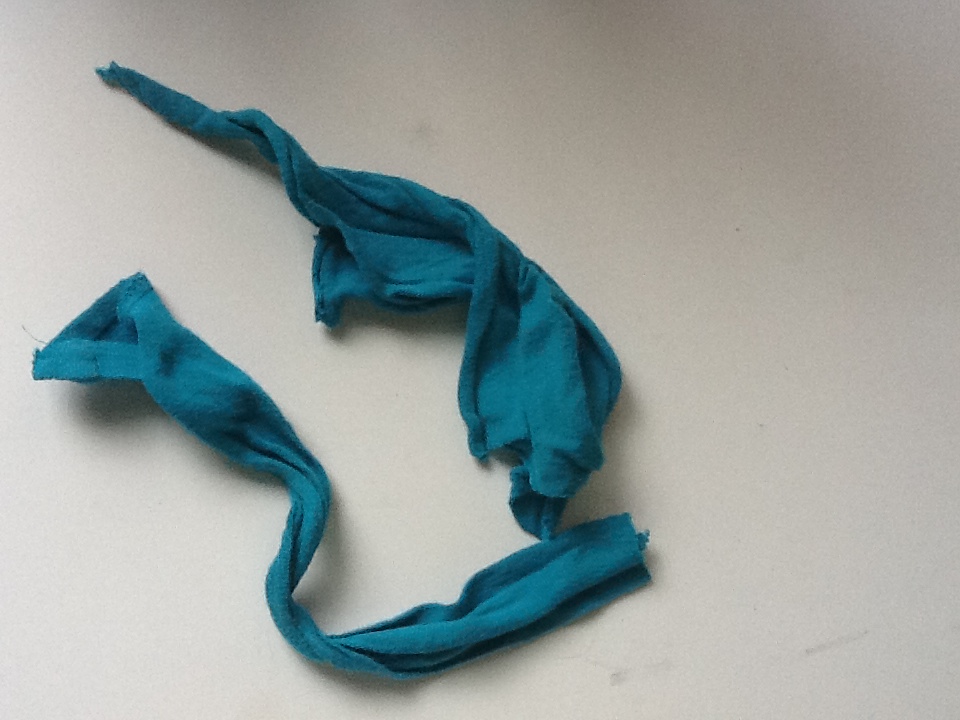
The first step has to be my favorite, you can create your rollers! Take an old t-shirt that you don't wear anymore, and either cut it or rip it into strips about 4-7 inches long, and about one inch wide. Keep in mind that you are going to tie these up when you have your hair wrapped around it, so make that a deciding factor when you are creating your DIY rollers.


Here are the finished strips! These create really pretty, tight curls, so I like to focus them mostly in the front and top layer of my hair. Remember that the tighter the curl, the shorter your hair appears. I like to put these all over the top half of my hair, starting at the end and rolling it up, and then knot the fabric so it is secure. I can leave these in overnight without a problem, so it is a super quick style for me!


Like I said, your hair is going to look shorter then it is if you have super tight curls in, but I like to have a little length to my curls, My favorite way to finish this off is by using foam rollers. I got these for about two dollars at Ulta, they are the one inch type. By putting these on the bottom half, I still get the full, bouncy appearance. but without loosing the length! If you want looser curls, you could use these all over, so adapt this style to your needs. These rollers work for me overnight as well, so I can put both of them in at night and wake up in the morning with picture-perfect curls.


This is the finished look! I separated some of the tighter curls to create a little more wave, and I love it. I did not use any other products in my hair other then my shampoo and conditioner, so I was pretty impressed with the shine! These feel so soft, I do not have to worry about it looking messy because it naturally falls out into these beautiful, glossy waves.


So this is my new favorite way to curl my hair! This will also make your hair stronger because you are preventing split ends. I know I cannot go the rest of the year without using heat on my hair, but this will definitely keep me from overusing my curling iron!

Tell me in the comments what you think of our new setup, and what your favorite rollers are if you use them! Make sure to follow, and thanks for reading!

Tuesday, July 24, 2012

My Travel Hair, Makeup, And Outfit!


Hey everyone!

     Good news, I found wifi! It is on and off though, so I will try to keep posting. Anyways, I thought it would be fun to show you what my go to traveling outfit, hair, and makeup is. I love traveling, but finding the perfect outfit is close to impossible. I never know what the plan is, so I have to be prepared for anything, which kills the whole juicy couture sweat suit idea. Even though these are really comfy to travel in, I prefer something a little more dressy. If you know me, you know I am not the biggest fan of anything casual. Sorry, but tee shirts are just not my thing! Anyways, this is my favorite way to look put together while on the go.

First, I like to have a top that you can dress up easily, so I chose something that was interesting on its own. I just got in this Forever 21 trapeze cut floral top, and I love it! This top is the epitome of casual chic, it is so comfy to wear.


If I want to dress it up a little, I put my cropped black sweater over it. The black makes the bright floral print in the top pop out even more, and you can still pair it all with a necklace. I have worn this sweater so much, it is one of my basics.


I just paired this with jean shorts to complete the look. These are really comfy to travel in, so I took two pairs of these in dark and light washes. I wear these all the time because they are actually at a decent length, and they are so hard to find!


I usually live in flats because they can easily be dressed up and they are comfy. My theory is that you should always be prepared to run into someone you know when you go out, because that happens to me 99.9% of the time! Flats make me feel a little more put together then flip flops, so if I happen to see someone, I never have to worry about having on too casual of an outfit! Oh, the joys of being a beauty philosopher.


My go to hairstyle for these days is usually a French braid. They are easy, quick, and elegant, plus they stay in place! I added a head wrap with this to keep everything in place because I have a ton of layers. They look great when my hair is curled, and they look much better when they are pulled back if my hair is up.

  Next is what I wear for my travel makeup. I absolutely dread the morning when I have to leave, they are so rushed and I do not have the essential time to complete my beauty routine! I decided to find some quick fixes that take you from dull to glam in seconds, these will stay on all day without feeling thick or drying.

My first favorite is my Mac lipstick in Hot Tahiti. This is a deep red, but it has more of a sheer, shiny finish. I apply this with a 316 lip brush to get the most precise application, but it would work just as well if you applied it out of the tube. I usually stay far away from applying just a lipstick without a gloss or anything, but this has such a beautiful finish I feel like I don't need anything else. Whenever you apply a red, even if it is not very opaque, it adds a pop of color and makes you look red carpet ready in seconds. I prefer to wear it as more of a stain, but I would highly encourage you to try more of a glossy red for a youthful pop of color.


I like to keep the eyes pretty simple, so I am sticking with soft browns. My two favorites are a really warm toned brown, Modelette, and a cooler toned one, Patina. These are both from Mac, and Patina is pictured to the left. I just apply a light layer of this with a 213 brush and build up the deepness of the color as I go toward the crease.


I just top the eye look off with a thin line of liquid eyeliner and my Makeup Forever Smokey Lash. This defines my eyes without competing with the softer red lip. When you keep the eyes simple, you can have fun with brighter lip colors and beautiful blushes.

And that is all I wear for traveling makeup! If I know I am going somewhere as soon as I arrive I will do my foundation routine, so if you are interested in my latest one, click on this link.

Those are my simple steps to looking chic while on the go! If I am in a hurry I follow these, so I have the routine down for when I travel! Make sure to follow if you haven't already, and tell me in the comments what your go to look is when you are in a rush. Thanks for reading!

~Perfectly Pink

Tuesday, June 5, 2012

Secret to Waves

Hello readers! So lately, I have been on the hunt to find the secret to waves. I have tried twisted wet hair and sleeping like that, and just curling my hair on a super low heat, but nothing seems to work! I decided that I will probably have to invest a little money in this search and buy a spray or hair waver. So these are my options. If you have tried any of these please comment and tell me how it was because right now I don't know which to choose.

First is this beach wave spray from the company Fekkai. It is pricey though (25.00) so before I get it I want to make sure it's worth the price.

Second is a Ocean Spray from Alterna. Its a bit cheaper (20.00) but I haven't tried any of Alterna's products before so I have no experience with their products.


Then I moved on to waving tools. The only issue is that I don't want my hair to look like it's been crimped. So here are the possibilities:

First is Hot Tool's gold and purple Three Barrel Waver. I have found that Hot Tools makes some of the beat quality beauty tools. Ex; hair curler, straightener, etc. But they certainly are hot. Expecially when you are checking to see if the curling iron is hot and you touch it and you realize that your heat protective glove has a hole in it. That really hurt. But back on topic. If I do get a hair waver, I think I will go with this one because I know it will be great quality! This hair waver is $20.00. Not bad really!

The next one is Bedhead's Deep Waver. This was originally $35.00, but right now at Ulta it is on sale for $27.00. I haven't had any experence with Bed Head before, but if you have please comment and tell me about it!

Please comment and tell me what you know about these products! I appreciate this!
--Glitter Girl:)

All of these products can be found at www.ulta.com

Saturday, May 5, 2012

Hair Bows!

For all of you adventurous hair stylists, this hair style is for you! So it's always cool to have a bow inyour hair but have you ever heard of making the bow out of your own hair? It seems impossible right? But actually, the girl in these two videos makes it super easy and you can do it on all lengths of hair!
You will learn how to do this one is the second video.
You'll learn how to do this one in the first video,

So heres the first video. http://www.youtube.com/watch?feature=player_detailpage&v=-MWqyGtzclQ
This one is probably this most impressive and craziest one, it just looks very hard to keep in place. But I must try this sometime...
Heres the second video. http://www.youtube.com/watch?feature=player_detailpage&v=AXRsJy9Rzdc#t=9s
This one is my favorite. It's so pretty when she makes the ribbons. It just doesn't look as good without the ribbons.

I hoped you liked this post! Please comment and tell me what you think!
--Glitter Girl

Friday, May 4, 2012

Sprial Curls!

Last night I was at a base ball game, and in the seats in front of me there was a girl and she had the most amazing curls.

So I decided that I really wanted to get curls like that. I asked some people and I found out that to get those "special" curls that you need to use a spiral curling iron. So today I went to Sally Beauty Supply (best store ever!) and I got one. Just for safety, I also got a heat protective glove, because you have to wrap your hair around the spirals. Or, you can just using it like a regular curling iron, and you will get spiral curls. They stay in better when you do it this way. When your wrap it around the curling iron your hair tends to look crimped after awhile.  It's super easy to do by yourself, and it takes under 10 minutes. My only complaint, is that if you don't use hair spray the spirals will start to look like you crimped your hair.


So here is a super cute hairstyle that you can do with a sprial curling iron!
First, Put your hair in a low side pony tail, but on the side that the pony tail is not on, leave down a strand of hair in the front of your face to shape your face.

Then, curl your side pony tail. This will give it a more sophisticated look.

Finally, take the piece you left down a spiral curl it. This looks really cool because it just adds some pop to the hairstye. if you want you can bobby pin the back of it back so it's not in your face.

And Voila!!

I hope you liked this post! Sorry, we haven't been posting as often,we will do our normal amount from now on!! We just have a really hectic week.


--Glitter Girl

Tuesday, April 17, 2012

My Curling Technique

Hey Everyone!

     I am really excited to attempt to explain my odd way that I curl my hair! It is strange, but it works. Most people start from the bottom and curl up, but you never really get the curl near the top because the heat of the curling iron doesn't get all the way through. This technique will help you achieve perfect curls every time!

To start off, you will have to use a curling iron with a larger barrel. It doesn't have to be huge, but anything 3/4 of an inch and larger will be perfect.  The reason you can't use a super small one is because you need your hair to work with the clamp release, and if it is wound too tightly against the barrel, it won't work. The thinner your hair is, the smaller you want to go so it will hold better.


Okay, now this is the hard part. It may take a little bit longer at first, but you will pick it up quickly. My hair is about 4 inches past my shoulders and about medium when it comes to thickness, and it used to take me around 20 minutes when I curled it the usual way. Now I can get it all done in about five minutes, and it looks so much better!


  • So the first step is to get your first section of hair. Start up at the top, just don't get it too close and burn yourself!
  • Once the curling iron is near the top, release the clamp and twist some more hair onto the barrel. 
  • You don't have to have the full section done yet, but repeat the previous step until the the piece is curled. 
  • And that's it! 
What I like to do is to keep my index finger on the clamp releaser and just keep squeezing it! This distributes the heat throughout the entire section of hair, making it very full and giving a ton of volume. 

Honestly, I don't use any products on my hair with this. It hold all day without anything! You may want to use a little hairspray if they usually fall out really quickly on you, but this works. Think about it, when you curl from the bottom, most of the heat is at the bottom. Using this method, it is distributed all over, making it last longer by not weighing down the bottom!

After I do this, I brush it out a little with a vented paddle brush. This means that it will lightly loosen your curls to make these huge waves! Believe me, it works! 


Thanks for reading, tell me in the comments if this works for you! I love it, it saves me a ton of time in the morning and hold all day! Be sure to follow and comment, also tell me what posts you want to see next!


♥'s and Major Waves, 
                                   Perfectly Pink

Wednesday, March 28, 2012

Living Proof

Before hair spray. Photo credit to http://www.livingproof.com/

After hair spray. Photo credit to http://www.livingproof.com/

     If you saw my last post, you saw that I bought some Living Proof Straight Hair Spray. Well I tried it, and it was sooo amazing I just had to tell you guys about it. On the Living Proof Website, they have this picture. My hair isn't curly, and the spray straightened my hair better the the curling iron ever has. It's also much easier because after you get out of the shower, you just spray your hair and then blow-dry.
     The company Living Proof also has some other products, I have not tried them yet, but all of te comments said that they work great.
1. This hairspray is supposed to help dry, or damaged hair.
Restore makes dry or damaged hair look, feel and behave like virgin hair. Watch the video.
Photo credit to http://www.livingproof.com/

2. This hairspray gets rid of frizz.
Read more about No Frizz Straight Treatment

3.  This  gives your hair more volume, and makes it look thicker.

Read more about Full Root Lifting Spray


4. This is hairspray that holds your hair in place firmly.
Hold Firm Hairspray
They also have a hairspray that holds your hair in place, but more flexible.
Hold Flexible Hairspray
Please comment and tell me what you think. If you like this blog, tell your friends because once we get 2,000 viewers we will have a contest! Also please follow our blog!
--Glitter Girl

Saturday, March 24, 2012

Top Knot!

Hey everyone!

     If you have seen my last post on the spring/summer dressed I have been looking at on Forever 21, you may have seen my hair comment. I said that a ton of the models on the website were wearing the top know style, and I thought it was so cute! It is really easy, here is how I do mine.

The first step is to gather your hair together like you would for a high ponytail and twist it. This is a super strange pic, I know, but this is the one that I thought best explained it! The twist can be messy, it all evens out in the knot part of it.


Next, all you need to do is take the roll of hair you have and knot it! I like to still keep my hair messy while doing this because it is easier to even out when you are done. After you knot it, take a shine serum and run it through any areas of frizziness. This will smooth it out and give it a hint of shine!


I like to put a headband in once I am done with it just to give some extra control. I hope you all enjoyed this short and sweet post on my new go to hairstyle!

 If you want a say in your favorite types of posts, you can by voting on our poll at the top right side of the page. Even if you do not have a blog, you can still comment on any post by commenting anonymously to tell us your favorite hairstyles/makeup/outfits! If you do have a blog, follow us to keep up on our posts!

I am also super excited to do my second post of the day! What beauty trend am I going to run with next? You will just have to check back and see! Here is a hint: It uses two colors, but can use more then two products. Thanks for reading!

-Perfectly Pink

Twitter Delicious Facebook Digg Stumbleupon Favorites More

 
Design by Free WordPress Themes | Bloggerized by Lasantha - Premium Blogger Themes | Premium Wordpress Themes