Showing posts with label DIY. Show all posts

Sunday, March 17, 2013

How To Make Lipstick Out of Crayons

Happy St. Patrick's Day!

I was messing around in the kitchen and found a box of crayons. I saw the non toxic, paraben free claims on the box. This made me think, which is never a good sign... Plenty of pigment, no harsh chemicals... It sounded like a lipstick! Keep reading to see how I attempted this!

Begin by collections your materials. You will need coconut oil for the base, olive oil for the shine, and crayons. Also make sure to have a spoon handy.

The first color I wanted to create was a soft coral. To get the perfect combination, I started off with Tickle Me Pink.

The other color that I added in was Burnt Orange. This gave me a mixture of cool and warm tones.


Next, light an old candle. I would recommend using one that you are not particularly fond of; I accidentally spilled a few ingredients here and there... I found this candle for a dollar at Walmart, so it did not hold much sentimental value!

Pour in some olive oil to your tablespoon. The reason I am not enclosing a presice measurement is because you can choose how much you want. The more you add, the shinier your lipstick will be. I am creating more of a buildable color that goes from sheer to opaque, so I started off with more and blotted away the excess with a paper towel.


Unwrap the paper around the crayons. I used about 1/4 of each crayon, so you do not have to unwrap the entire thing.

Cut off the amount that you want to use. Play around with lighter and darker ratios.

Now that the materials are prepared, put it all in your spoon! Instead of holding the spoon the entire time, I turned two coffee cups upside down to create a holder for it. What can I say, my hand got tired after a while!


This is how quickly the crayons melted for me. I used a mini candle, so you can cut the time in half by using a full sized one.

All that is left to do is pour it in a container! I decided to have them in pan form so I could create a palette.

I placed my pan in the refirdgarator for about ten minutes before using it. Placing it on a notecard or any type of paper prevents the product from sticking to the surface.

It is that easy! Here are the colors I have previously created. The new color is not in the palette yet. I should name these! Leave any suggestions in the comments.

At first, this felt like something I would try in my early teenage years. I have to admit, I was suspicious at first. Surprisingly, it does not have any waxy residue or taste to it. I really enjoyed creating them! Tell me in the comments if you will try this, and if so, what colors will you create? Make sure to leave name suggestions in the comments as well! Thanks for reading!


Perfectly Pink


Sunday, August 12, 2012

Simple DIY T-Shirt Curls

Hey Everyone!

      Recognize us? Yes, Forever Fuchsia got a makeover! We loved the old website, but we feel like this one represents us more, and we could not be happier with it! We are still working out some kinks, so keep checking back to see our latest updates! Anyways, I thought I would do a hair tutorial to kick off our back to school series! If you know me, I usually have my hair curled. Or straightened. Or in some strange style that requires heat. Yes, I admit, I really overuse my heat tools, but I do not feel finished unless I have me hair done! I have tried rollers in the past, but I could never sleep on them, so I went straight to using heat on it. I finally figured out a style that uses no heat, plus you can create the rollers at home!


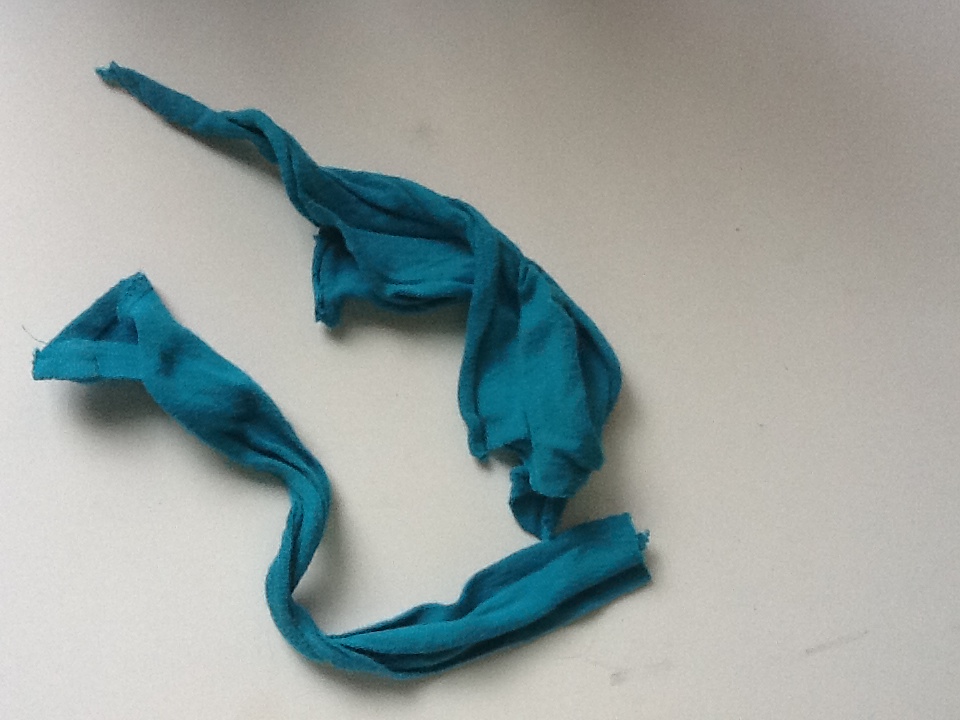
The first step has to be my favorite, you can create your rollers! Take an old t-shirt that you don't wear anymore, and either cut it or rip it into strips about 4-7 inches long, and about one inch wide. Keep in mind that you are going to tie these up when you have your hair wrapped around it, so make that a deciding factor when you are creating your DIY rollers.


Here are the finished strips! These create really pretty, tight curls, so I like to focus them mostly in the front and top layer of my hair. Remember that the tighter the curl, the shorter your hair appears. I like to put these all over the top half of my hair, starting at the end and rolling it up, and then knot the fabric so it is secure. I can leave these in overnight without a problem, so it is a super quick style for me!


Like I said, your hair is going to look shorter then it is if you have super tight curls in, but I like to have a little length to my curls, My favorite way to finish this off is by using foam rollers. I got these for about two dollars at Ulta, they are the one inch type. By putting these on the bottom half, I still get the full, bouncy appearance. but without loosing the length! If you want looser curls, you could use these all over, so adapt this style to your needs. These rollers work for me overnight as well, so I can put both of them in at night and wake up in the morning with picture-perfect curls.


This is the finished look! I separated some of the tighter curls to create a little more wave, and I love it. I did not use any other products in my hair other then my shampoo and conditioner, so I was pretty impressed with the shine! These feel so soft, I do not have to worry about it looking messy because it naturally falls out into these beautiful, glossy waves.


So this is my new favorite way to curl my hair! This will also make your hair stronger because you are preventing split ends. I know I cannot go the rest of the year without using heat on my hair, but this will definitely keep me from overusing my curling iron!

Tell me in the comments what you think of our new setup, and what your favorite rollers are if you use them! Make sure to follow, and thanks for reading!

Twitter Delicious Facebook Digg Stumbleupon Favorites More

 
Design by Free WordPress Themes | Bloggerized by Lasantha - Premium Blogger Themes | Premium Wordpress Themes